set a light 3d Portrait comparison

In this project, I used the Set a Light 3D virtual photo studio simulator to create a portrait,  which I then recreated in real life with physical cameras and lighting equipment. I used Set a Light 3D to set the lighting, camera, and person to obtain the portrait composition and style I intended. After completing my virtual setup, I produced the portrait image and got ready to recreate the image with a real set and model. Finally, I compared the final real-world portrait to the virtual portrait created in Set a Light 3D.


Cyanotype Print

In this project, I printed my black and white photo onto a transparent sheet and layered it on paper coated with an iron salt solution, creating a Cyanotype effect. I then clipped it down and put it in the sun for 10 minutes and lastly washed it with water to develop and fix the image.

Set 2 Signs/Street

The photographer who inspired me was Lee Friedlander an American photographer and artist that specializes in street photography.  I was inspired by his photography of signs and the way he portrays them in his photographs. I wanted to portray and highlight the different aspects of signs along with everyday life. For this project, I carefully chose five photographs that accurately portrayed what I wanted to convey. Each photograph captured not only the actual structure of the sign but also the atmosphere and narrative of the surrounding area. By using various angles, perspectives, and compositional techniques, I aimed to capture the characteristics of the signage. I used a Canon g7x MarkIII camera with a 25-lens. The 25-lens’ wide-angle perspective enabled me to shoot vast photos that included more of the surrounding area, giving the signage a greater context. Meanwhile, the Canon g7x MarkIII provided portability and variety, allowing me to try out numerous angles and compositions. Additionally, achieving the proper lighting conditions was tough. The Canon g7x MarkIII is not a professional-grade camera and had problems achieving the optimal aperture and depth of field in certain scenarios. To address this, I responded to the available lighting conditions by modifying exposure settings, utilizing natural light, and embracing the atmospheric elements given by various lighting scenarios.

Set 1 Structures

I choose to concentrate on a variety of structures for this set, such as tall skyscrapers, industrial structures, architectural details, and modern structures. Ming Thein, a 38-year-old man who has been taking pictures since he was 16 years old, is the photographer who gave me inspiration for my works. Thein has a wide range of photographic techniques, but one that particularly caught my eye was how he included buildings and architectural details in his images. My objective was to draw attention to the special qualities of the intricacies in structures, accentuate them, and portray them in an enthralling manner. In an attempt to let the image speak for itself, I tried to bring attention to the rust, distinct lines, and residual portions of its former use. The photos were taken on both a 25-lens and also a Canon g7x MarkIII. The wide-angle perspective of the 25-lens helped take expansive pictures and capture more of the surroundings. My hopes were to make each picture unique and use different angles to capture the intriguing aspects. Although my pictures turned out the way I wanted to, I encountered some limitations along the way. First it was very difficult for me to find locations to take these photos as it was either too basic or did not fit my ideal style. Along with this, I also faced challenges in capturing the desired lighting conditions, and since the Canon g7x MarkIII isn’t necessarily the most professional picture-taking camera, it was difficult to obtain my ideal aperture and depth of field in certain situations. Despite these limitations, I remained determined to capture the essence of the structures and showcase their complexities.

Set 2 – Self Reflection


In my second set, I decided to implement reflection more uniquely self-reflection. I was inspired by Lee Friedlander, an American photographer recognized for his creative approach to self-portraiture and street photography. For this set, I decided to use myself as the main subject; I was able to set my camera up and position myself to portray myself in various settings and moods. Drawing inspiration from Friedlander’s unique use of mirrored surfaces, I sought diverse settings that would allow me to incorporate a wide range of reflections into my photography. For many of my shots, I used a flashlight to add a shadow effect to many of my photos, and by using close-ups and wide shots, I could capture introspective self-portraits. To improve my images, I could have included more subjects and self-reflective elements in my photos, such as objects or symbols representing my identity.


Set 1 – Long Exposure Reflection


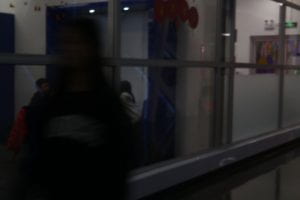
I took inspiration from Alexey Titarenko, a Russian photographer known for his mesmerizing, prolonged exposure to black-and-white images. Titarenko’s unique style highlights human figures and movement, creating hauntingly beautiful compositions. In my photographs, I used a slow shutter speed of between 8 and 12 to create a similar effect to Titarenko’s work and introduce motion blur and long exposure into my images. This allowed me to capture the movement of objects in a single frame. Furthermore, I toned my black-and-white photos, creating a more profound composition and evoking a sense of abstraction. I hoped to give off a ghost type like Titarenkos’s “Ghost Cities” book. My images also include a form of reflection that highlights my subject and the environment/setting; by using mirrors and windows, I was able to create a sense of depth and an added layer of attraction to my compositions.  I could have used more intricate backgrounds to add more details to the photo, making them more interesting, and used different angles to bring more depth. 
Welcome to Your New Blog!

When you blog you create posts and posts are categorised according to your subject. Some categories have already been set up for you. If you need more categories you can add them as needed. It’s important that your posts have the following:

  • An engaging title – this should not include the name of the subject since this is referenced in the category.
  • Body – this is where you share your learning. This can include text, images, embedded videos from Dragons’ Tube or elsewhere. You should always consider how your post looks to your audience. Is it engaging? Do they want to keep reading?
  • Category – select one that has been set for you or add a new category. Posts can have more than one category e.g. Humanities and Myself as a Learner

Click on the images below to learn more about blogging: