Engineering Blogpost #4

Pictures and video of the final product (2nd prototype):

Photo of the body of the 2nd prototype.
Front view of the 2nd prototype.

IMG_3097 (Link to a video showing me manually spinning the axle to demonstrate the functionality of the rubber band winding on the 2nd prototype)

(1st prototype:)

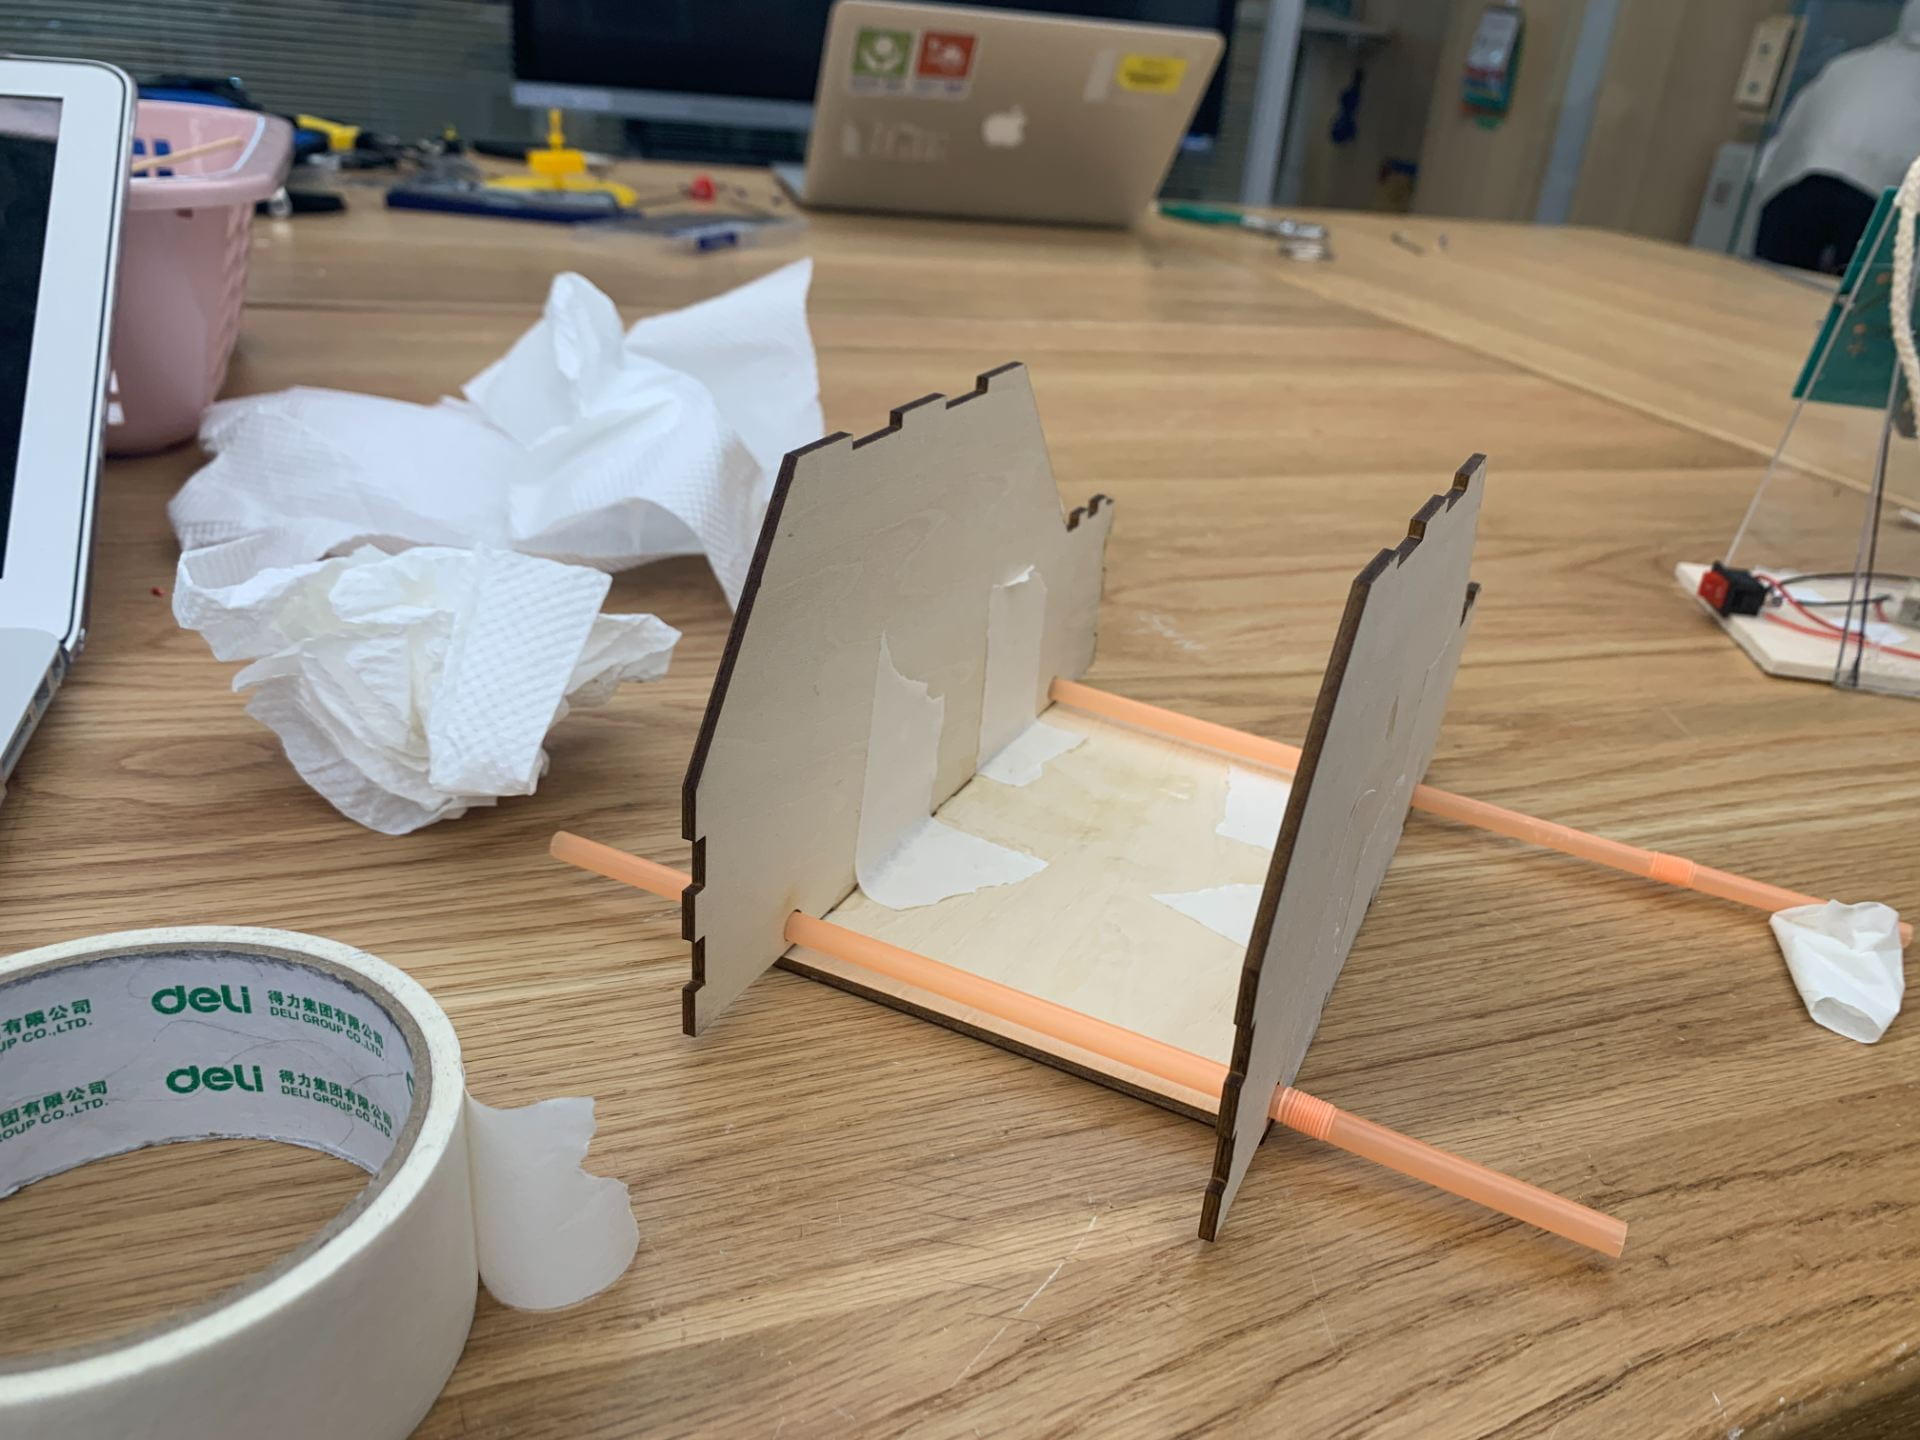
IMG_3062 (Link to a video showing the winding and releasing of the 1st prototype)

Top view of completed prototype #1.

I intended on my product to rely on elastic energy to propel the car forwards, thereby resulting in kinetic energy. When the vehicle is pulled backward, the spinning of the back axle results in the winding of the rubber band around the back axle, which results in tension applied on the rubber band and the rubber band extending longer, which prepares and expands the elastic potential energy stored in the rubber band. When the car is released, the tension from the rubber band is released and the rubber band contracts, where the back axle spins with assistance and as a result of the contracting action of the back axle. The back axle is connected to wheels which, when turned, will result in the car being propelled forwards (kinetic energy). Although some energy is lost in the form of thermal energy (due to friction) and sound energy (from the “snapping” of the contracting rubber band, the intended output (kinetic energy) is achieved before the car slows down due to friction. Thus, the toy begins with elastic (potential) energy, then leads to mechanical energy (spinning of the axle), and consequently ends with kinetic energy (movement of the car).

It is of my opinion that I was largely successful in producing a functional test prototype that primarily works as intended, allowing me to test the product and analyze improvements that I can make. I was also quite successful in the development and plan stage of the design project because I believe that I have made a good plan that details the product that I will make, albeit with a few discrepancies and mistakes.

I think I can improve on my time management since I could have used my time more wisely and had finished my project as a result. I also believe that I could work on the aesthetics and design elements of the product. Although my product looks decent with neat laser-cut edges wood, I could possibly add windows, doors, or other etched decorations onto the body to improve the looks of the product.

The product is primarily intended for children to learn about energy change and at the same time have a toy that they can play around with, resulting in the children (which is the target audience/client) having fun and learning at the same time. The adjustable position of the rubber band (in the 1st prototype) can also allow for the client to explore how initially tensioning or relaxing the rubber band will affect the movement of the car, allowing for analysis of this toy as part of an experiment. I also envisioned so that objects could be placed on top of the car (on the roof), allowing for more experimentation and seeing how added mass will affect the distance traveled or other factors.

The impact my product has on the environment is not too positive, since I relied on laser-cut wood to make my product. Some areas that could be sustainable or more friendly to the environment include the straws to hold the axles, which can be made from used straws to support sustainability, and the skewers acting as axles, which can be made from used or reused skewers.


Engineering Blogpost #3

Design class #1: I focused my time this lesson entirely on the template of the car since the chassis and body of the car are to be laser-cut. I also gathered some of the materials needed (skewers, straws) and inquired about the 3mm plywood and laser-cutting machine.

In the initial draft for the template, I focused on recreating the general shape of the car.
Finished template layout

Design class #2: I prepared the finished template for laser printing by rearranging the pieces. I decided to print out the chassis and sides only to test the skewers and elasticity of the rubber bands. For me to be able to test the prototype, I used wood glue to stick the pieces together. I learned that I should use painter’s tape to temporarily hold the wood pieces in place and for the wood glue to set.

I marked the areas to cut the straw/axle holders as well.

Prototype pieces that were cut out and stuck together with wood glue.
Top view of prototype.
Prototype with axle holders (straws) installed, not cut.

Design class #3: I finished up the 1st prototype by cutting parts of the straws off to hold the axle as well as cutting off parts of a skewer to act as an axle. After that, I have used hot glue and painter’s tape to secure the elastic band onto the body and the back axle. I have decided to not use a dowel/skewer to hold both ends of the rubber band. Instead, I will glue the rubber band directly on it.

I used painter’s tape to attach the elastic band to the body so I could experiment with placing the elastic band on different parts of the body.

Top view of completed prototype #1.
Another view of the first prototype. Note that the side pieces are bent.

IMG_3062 (Link to a video of the first prototype being tested)

Design class #4: Because of the 1st prototype not being cut properly (and after feedback given from peers in regards to the bent sides), I decided to laser cut all of the pieces again, including the bumper, hood, and top piece. Because there was a queue for the laser-cutting machine, I waited for most of the class to get my wood pieces cut. I also used wood glue and stuck the pieces together.

I dismantled parts of my 1st Prototype to measure the skewer length and straw length and make adjustments from thereon.

Picture of the body of 2nd prototype.
Photo of the 1st and 2nd Prototype together.

Design lesson #5: Parts of the body of the 2nd Prototype did not stick properly. I spent some time regluing certain parts of the car. I’ve also noticed that I have miscalculated the length and width of the car, resulting in the inaccuracy of some parts. I attached the rubber band to the back axle, but I did not have enough time to finish the front axle and attach wheels onto the car.

If I had more time, I would finish attaching the wheels to the car and then thoroughly test it out.

Front view of the 2nd prototype.
Close-up of the front. As you can see, some parts are misaligned.
Back view of the 2nd prototype, showing the back axle in place.


Engineering Blogpost #2

Sketch/plan of the product

For the Engineering project, I decided to make an elastic-powered car with a 3-millimeter thick wood laser cut with extruding parts to allow for me to apply adhesive to stick the pieces together.

Techniques I will need to master:

One of the major components of my project is the laser-cut body, so I spent a lot of time manually drawing out the lines from scratch to cut and to ensure that the parts are cut at the same length in order to fit in together. I decided to use Adobe Illustrator to design the body of the car due to me being somewhat familiar with the software. If help is needed with the laser-cutting portion of the car, I can search online and consult one of the design facilitators on laser-cutting.

After all the parts are laser cut, I will need to stick the wood pieces together. I plan on using wood glue, which works well with flat, 90 degree corners in a staggered pattern (see sketch and adobe illustrator picture). I have used wood glue in the past during Grade 8 Product Design to stick together a laser-cut box, therefore I feel that I should be able to use wood glue effectively. If I do run into trouble using wood glue, I can consult the design facilitators and they can give me advice on the usage and application of wood glue.

I will also need to use hot glue in order to apply the dowels/columns that hold the rubber bands in place, which I can do by practicing using the hot glue gun or with help from my colleagues. Previously in Grade 8 Product Design, I have used hot glue therefore I feel that I will be able to accomplish using hot glue in my project.

The laser-cutting template as seen on Adobe Illustrator. Text included is for measurement reference.

Materials needed:

  • Skewers to act as axles (Confirmed)
  • Straws to hold axles (Confirmed)
  • 3mm Plywood for the body of car (To be confirmed)
  • Laser-cutting machine to cut wood (Confirmed, need to send parts in advance)
  • Wood glue (Confirmed)
  • Hot glue (Confirmed)

Timeline:

Lesson 1: Inquire into materials, start designing laser-print template

Lesson 2: Finish laser-print template, start laser-cutting

Lesson 3: Finish 1st prototype, re-print parts (if needed), ask for feedback

Lesson 4: Start final product assembly

Lesson 5: Finish final product, test product


Reading Reflection #3

Since my last reflection, I have read The Time Machine by H.G. Wells. I think this novel is somewhat complicated to take in and understand, but the story is very interesting and intriguing to me. Despite the seemingly short length of the novel, it revolves around a single individual and his adventure into the future. I would only recommend this book to people that are enthusiastic and focused on reading, because the vocabulary used in this novel is similar to those used in the 1800s, requiring some effort and searching in order to get the full meaning of the book.

I’ve just finished The Time Machine and a lot has happened since the start of the book. The novel itself is about the adventure of a time traveler told from his own perspective after exploring the future a few thousand years from now, where the time traveler has to find his time machine which was hidden by the beings of the future to prevent from being stuck in the primitive future. In my opinion, the text is quite engaging, since the elements of fiction the author chooses in the novel allowed me to fully understand the abstract objects within the story by describing the objects using smilies and metaphors.

I’m currently considering using the novel Death’s End by Liu Cixin to use for my independent essay. Although this book is a very long read, I believe that I am more familiar with the cultural and literary content of the book compared to my other reads this year. I think that my chosen text uses various literary techniques to describe and convey a purpose as similarly seen in many science fiction novels, allowing for me to better and more easily analyze the choices made by the author. My current intention is to focus on how Cixin uses literary techniques within his book to convey a theme and the author’s tone towards the universe and human development. Cixin uses the elements of fiction in his novel to allow the reader to better understand the text by describing artificial and abstract items and also to understand the development of the plot and sequence of events in the story.

I am not very concerned with the independent literary essay, but I am somewhat concerned about how we will be assessed in the literary analysis essay and whether the strands assessed will be the same as before or if there will be differences from the past essay assignments.