For this project, me and my partner Joesph followed our designs and created a similar device as we planned. Although there were some slightly technique changes, however, we followed the design and were able to produce a version of ours out of it. Below is a comparison between our planned and actual product?


Planned vs Reality
Day 1 – Wheels + Chassis making


To began with, we first made the base and chassis of our solar powered car. Me and my parter used plastic straws and hot glued them onto the back base of our car, this was for supporting and consolidating the wooden skewers used for connecting our two wheels.

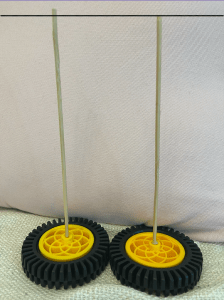
We purposefully made the back wheel longer than the front because this stabilized the center gravity of our car. By making the back wheel slightly longer, the car runs more smoothly on the track and does not wiggle around when encounters obstacles or outer interference.
Day 2 – Base making

For this lesson, me and Joesph made the base in which provided support for the solar panels, motor and wiring. We used double wood blocks and hot glued them onto the base of our solar powered car.
Day 3 – Assembling all the parts
 .
.
For this lesson, we assembled all the parts together and soldered all the connecting pieces. We first measured out the voltage of the solar panels and then found the corresponding motor in which has roughly the same amount of energy as the solar panels. However, we couldn’t find the exactly matching motor, so we went with one which had a way smaller voltage. After choosing the motors and solar panels, Joesph soldered the positive (blue) wire onto the positive side of the solar panel, and the negative (yellow) wire to the negative side of the solar panel. Then, soldering the yellow wire onto the corresponding negative side of the motor (the circle represented the positive side for the motor). Lastly, we connected the positive remaining wires onto a switch in which will control the car’s on and off functions.


Day 4+5 – Final touches + Test and Changes
Final touches
For the last step, we added a fan blade, attaching it to the back of the motor.


First test
The first test did not go as planned, as our car did not even budge a bit. [below is the video of first experiment]
As you could clearly see, when exposed under sunlight, the energy wasn’t able to be transferred from the solar panels to the motor. Facing the issue, I used the multimeter and measured both of the motor and the solar panels. Turns out, the motor wasn’t working, so we took out and replaced with a brand new motor and went for test for the second time.
The second time turns out to be a failure again. We asked Mr. Julio and Jerry for help, they suggested that the problem may be the switch interfering with the whole process, so we took out the switch and simply connected the two positive wires together by wrapping them around each other

Last and final test:
This time it finally worked. The motor was able to spin, and the fan blades were moving along with it (check video below)
Final Looks


