Joseph

"I have no special talent. I am only passionately curious" - Albert Einstein

Category: Uncategorized (page 1 of 2)

Photography Set 2, Presenting, and plans for set 3.

Artist Analysis: Anthony Gerace

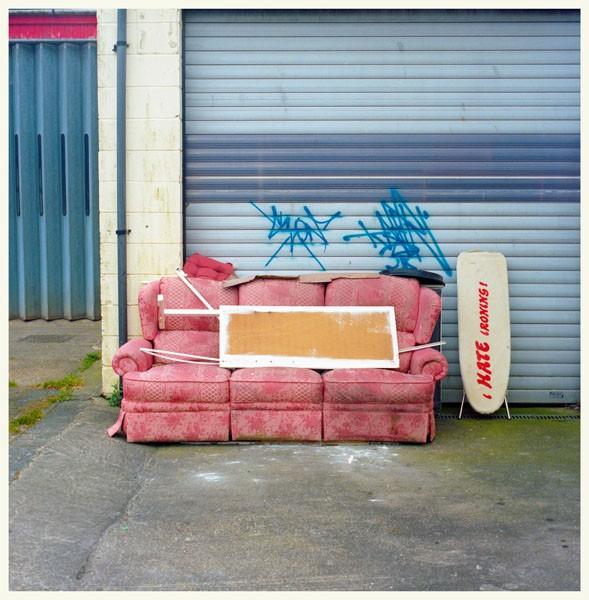
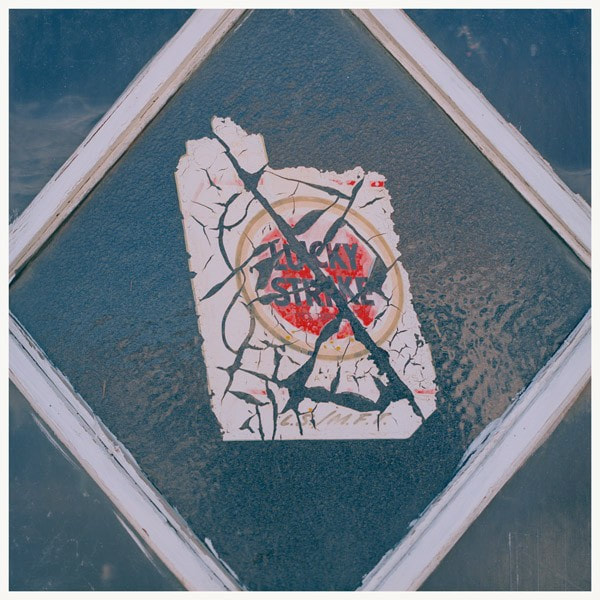
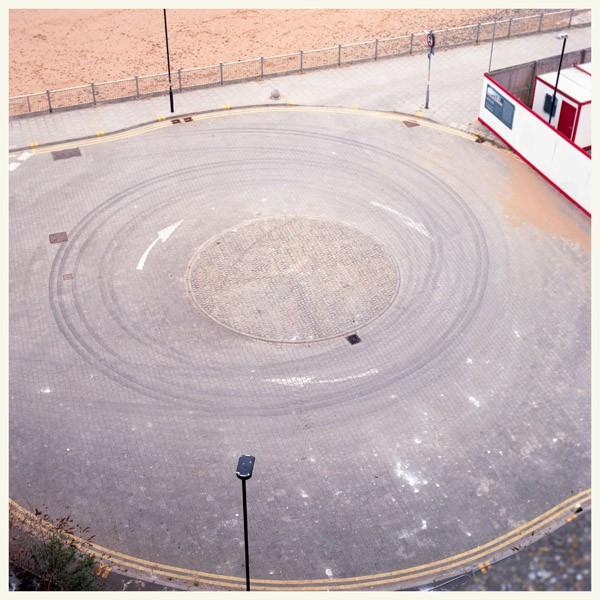
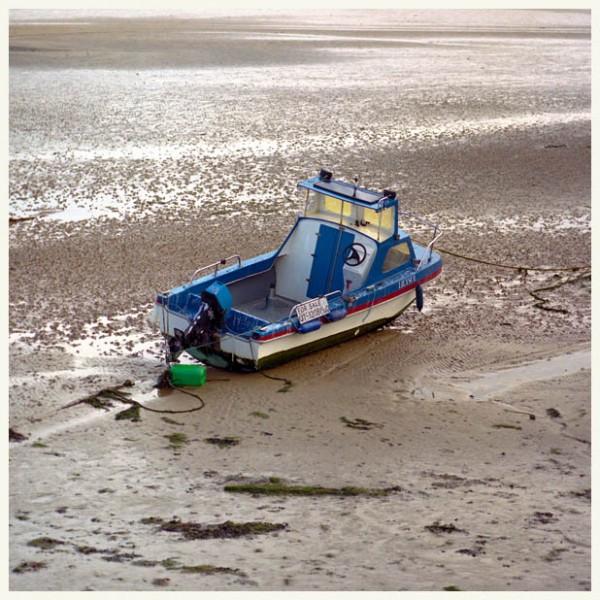
Anthony Gerace is a british artist and a photograph and usually takes photos on discarded items. He also works on typography and draws portraits using repetitive shape of squares as it create mosaics. Most importantly, he focuses on subjects that can cause huge environmental harm and wants the audience to react surprised by the photos. His way of using unique background while taking significant size of the subjects can create his special technique and his own trade mark. Oftenly, he takes photographs from a bright setting , where there are sands and deserts on the background. The color of the background gives the impression of the desolate and the wild situation the human population are at. One thing that I liked from Anthony Gerace’s work was that he does not try to make out the settings we want but he waits until the right timing comes to press the shutter and tries to take photos that were naturally settled. Although I might not create his background, I want to slightly change my vision to show the aspects of neglect to the environment where the audience lives. Similar to the last set but different from Anthony Gerace’s, I won’t limit myself to one specific background, because my point is to tell how much those discarded items can harm the environment.


How does the Photograph from Anthony Gerace inspires me and the visual, technical, and conceptual techniques


First, photos of Anthony Gerace that inspires me to follow his vision:

Visual: When you take a look at Anthony Gerace’s photographs, we can visually notice that the subjects are comparatively larger than the ones of Eian Kantor’s work, and the color and the shapes can somewhat create abstract beauty in the photographs. The background, that I have mentioned earlier is somewhat natural and makes the audience to focus on the discarded items carefully.

Technical: The shutter speed and the focus seems just center focused and seems to be normal when taking normal photos one a subject. Background is rather clear than blurred and the exposure and the shutter speed could be low  as these photographs does not capture photos of movements and only non-moving objects.

Conceptual:

As stated above, Anthony Gerace’s work is interesting to me as he uses similar background and attracts the audience. For me, I would try to take the photos inside the background of a school to address what discarded objects that can affect the environment severely. That way, I might point out my unique background.


Critique of Set 2 Image


Yellow Selection:


Green Selection:

Red Selection:


All photos to Yellow Selection:

When I had to select the images from all of my photographs, I tried to pick the photos that showed the harmful environmental effects that discarded items can give. That way, I chose many discarded objects that had subjects of general garbage such as plastic and paper waste.  While I picked the images I could conclude that when there was many discarded objects it brought up the massive environmental impact and even created some abstract beauty. For example, if you take a look at photo number 34, we can notice that the number of batteries can give a pattern of repeated subjects that were taken as subjects. It thus gives the audience impression of fear of how many discarded objects are in the school. However, when you take a look at Photo Number 59, there is only a plastic bottle on the cafeteria which does not seem to have a significant impact on the audience.


Yellow Selection to green selection:


After I chosen handful of photographs into my yellow selection and thought what would fit my vision to be in the green selection. I then decided to pick photos that contained the subject of common discarded objects. In normal abstract photography, I would chosen photos that took account of unique subjects that impress the audience. However, I wanted to present all of my photos that combined Set 1 and 2 to create a shape of a trash bin out of photos using Affinity designer. Although I would use the majority of my photographs, I wanted to center the common discarded objects and chose photographs with discarded objects  that all people would encounter those on their daily life.


Green selection to Red Selection

For the last part of choosing my best three photographs, I looked at the aesthetical techniques and beauty that were used in the photograph. As I mentioned earlier, I am planning to present my work with all of my photographs, but the three photographs were the best photos took out of me. First photograph contains the subject of paper objects that were discarded. We could notice a lot of colors of different paper and the shape of the whole bunch is little crumbled. That way, I thought the this photo suited my vision perfectly. For my second photo, it is an image that contains massive amount of batteries in a plastic container. Repetitive object abstractly creates beauty and also gives an impression of harmful effects when batteries rot. The last photo is about two plastic candy wrappers on a table. This was chosen as a red photograph because those wrappers are one of the most common discarded object for students. Additionally, plastic is the most harmful element to the environment as it releases chemicals and takes over 2000 years to rot.

Red photos for better quality

Red Photo 1

Red Photo 2

Red photo 3


Presenting my photographs in Set 1 and Set 2:


After taking all of my photographs of Set 1 and 2, I decided to present my photography into a one list of a paper that could fit in all of the discarded objects. That way, I did not only use my six red photographs but also the photos that were not even in the yellow selection to make a impression of how much discarded objects are in ISB.

This is the outcome of my work using Affinity Publisher:

If you take a look at the screen shot above, the size of each photos are different to give abstract beauty into my work. I originally planned to fit all of my photographs in a shape of a square but I thought changing the size could highlight the different discarded objects that is in the school.

The width of the paper will be 16.4 inches and the height of it will be 31.5 inches.


(Set 3)

Although I could not take photos fro set 3 because I had to prepare for presenting my photos in set 1 and 2, but if I had the chance to work on my set 3 I would still focus on the topic of discarded objects but only focus on only one subject.

For example, I would focus on taking photograph of plastic bottles that were discarded around the school and point out how many plastic bottles are littered. I could have similar topic but have different angles so I could create abstract beauty.


I would have tried to have similar techniques with the work of Morgan Schultz.

Like the image below I could have make the background dark.


Discarded: I on Behance


Street Photography Set 1 Creating

Artist Analysis:

The artist that I am inspired to take photographs are the work of Eian Kantor. Eian Kantor is an artist who have the same vision with me. He does not view discarded items as a threat for the environment but an interesting facet to take photographs. Below is some photographs of Eian Kantor.


As you can see from the work of Eian Kantor, he only take photos on particular discarded items. There are no blurred background, and I cannot describe rather his works are taken in short or long exposure. I could also see that there are specific subject in photos so the audience might not get distracted from other things. When compared with other street photography topics, I think discarded items could be simple because shutter speed and exposure might not matter here since I will be taking photos based on sedentary discarded items. I think these photos can create abstract beauty for the audience, and I really liked the concept because it felt like breaking the prejudice of discarded items that it should be always dirty. Additionally, the concept of taking photos on discarded items are not common technique used by people, and for me I also did not know people can make discarded items beautiful. As I mentioned from the starting point, I am planning to take photos just like Eian Kantor does but on its presenting stage I am going to list my photographs into a line to show its abstract beauty. Eian Kantor’s photographs are like my favorite photos because he does not limit himself on one topic and continues to take pictures. In the last unit, it was a little difficult for me to take photos because the reflection project was little specific. I wanted to take photos based on a broader context, and Eian Kantor’s images will help me to work on my creating stage. Based on those reason, I will relate my vision with the global context of how lot of discarded items are spread out in many places but it can be photographed in a beautiful way.

How does the Photograph from Eian Kantor inspires me and the visual, technical, and conceptual techniques


Eian Kantor’s photographs inspired me to work on my set 1, which was basically running around the whole school and having a scavanger hunt for discarded items. But I did not want to search for trash bins but wanted to take photos that was a little different from “trash”. Eian Kantor’s photographs solidified my vision.

When I take a look at his photographs, I could see that there are not much technical things added to the camera and the shutter speeds looks a little fast. However, it focuses the subject without blurring the background, so I hope to learn this while I am taking photos for set 2.


Critique of Red Images

These are my photos for my Choices choices choices unit:


These are my yellow selection Contact Sheet

These are my green selection Contact Sheet


These are my red selection Contact Sheet


While taking photos around the school, I tried to focus to take images that clearly stated the beautiful aspects of discarded items. I will going to handle the dangerous environmental affects that discarded items can cause in set 2. As I mentioned from the previous connecting part and the starting unit, I am also planning to present my work as a wide, long display of photographs.

All photographs to Yellow Selection

For deciding the photos for the yellow selection, it was comparatively simple for me to filter out the images that did not fit with my vision. I tried to make my projects as the work of Eian Kantor, so I removed the photos that gave me an impression that the discarded item looked exactly like trash and it did not give away any beauty. One example that demonstrates my vision for this process can be explained by choosing photo number 34 rather than photo number 22. If you take a look at photo number 22, you can tell that it is one of the common exmpales of garbage of a food container. However, photo 34 is completely different from photo 22 because it contains both reflection and creates pattern while it is just still plastic bottle caps.


Photo number 34(Please click this link to see photo number 34)

Photo number 22(Please click this link to see photo number 22)


Yellow Selection to the Green selection

Time to choose photos between yellow and green, and it became a difficult decision this time when compared to selecting the yellow selection. This time, all of the yellow selection had somewhat abstract beauty when I looked at them, so I decided to pick out more rare photos by having photos that contain one specific photograph so it did not distract the audience.  For example I did not choose to take photo number 6 to the green selection because the subject of the discarded items distracted even me so much. I thought that two subjects of paper and the shoe was two different elements that should have been taken form different angle.

Photo number 6( Please click the link to see Photo number 6)


Green Selection to the Red Selection


After I have chosen nine photogrphas that have made through the green selection, I had to face myself from the last step to take the red selection. Actually, what I wannt to say is that while I am presenting I am planning to combine photos from some yellow, green, and red selection to create a whole line. Whatsoever, the top three photographs were whether the subject was depending on the size of the photograph. When I took photos toward large subjects, it could easily create patterns, line and shape such as the one for photo number one, as the large metal discarded item was actually creating abstract beauty.


Photo Number one (Please click the link to see what photo one looks like)


Connecting Choices- Discarded Items

The artist that I am inspired to take photographs are the work of Eian Kantor. Eian Kantor is an artist who have the same vision with me. He does not view discarded items as a threat for the environment but an interesting facet to take photographs. Below is some photographs of Eian Kantor.


As you can see from the work of Eian Kantor, he only take photos on particular discarded items. There are no blurred background, and I cannot describe rather his works are taken in short or long exposure. I could also see that there are specific subject in photos so the audience might not get distracted from other things. When compared with other street photography topics, I think discarded items could be simple because shutter speed and exposure might not matter here since I will be taking photos based on sedentary discarded items. I think these photos can create abstract beauty for the audience, and I really liked the concept because it felt like breaking the prejudice of discarded items that it should be always dirty. Additionally, the concept of taking photos on discarded items are not common technique used by people, and for me I also did not know people can make discarded items beautiful. As I mentioned from the starting point, I am planning to take photos just like Eian Kantor does but on its presenting stage I am going to list my photographs into a line to show its abstract beauty. Eian Kantor’s photographs are like my favorite photos because he does not limit himself on one topic and continues to take pictures. In the last unit, it was a little difficult for me to take photos because the reflection project was little specific. I wanted to take photos based on a broader context, and Eian Kantor’s images will help me to work on my creating stage. Based on those reason, I will relate my vision with the global context of how lot of discarded items are spread out in many places but it can be photographed in a beautiful way.

This is the link for my Discarded Item Photography-> https://app.popplet.com/#/p/7377767

Screen Shots Below:


Inspiration from the works of others:

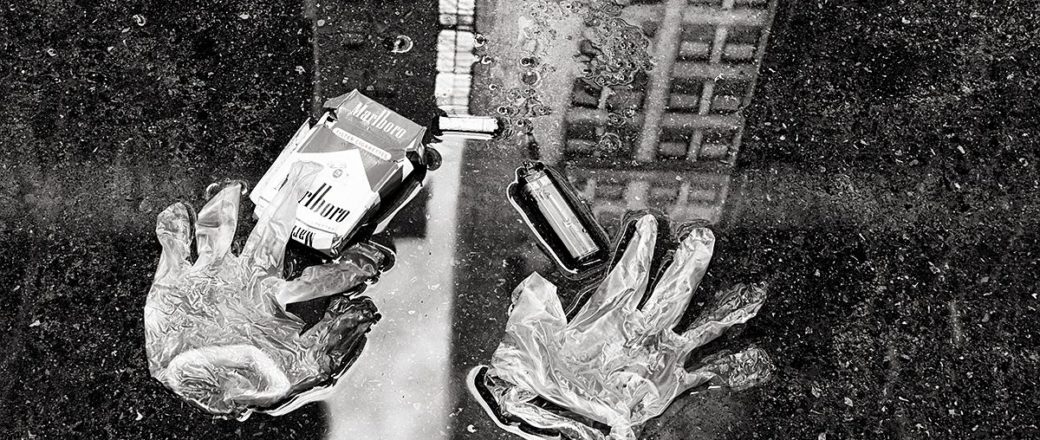
Steve Geer: Discarded | MONOVISIONS - Black & White Photography Magazine

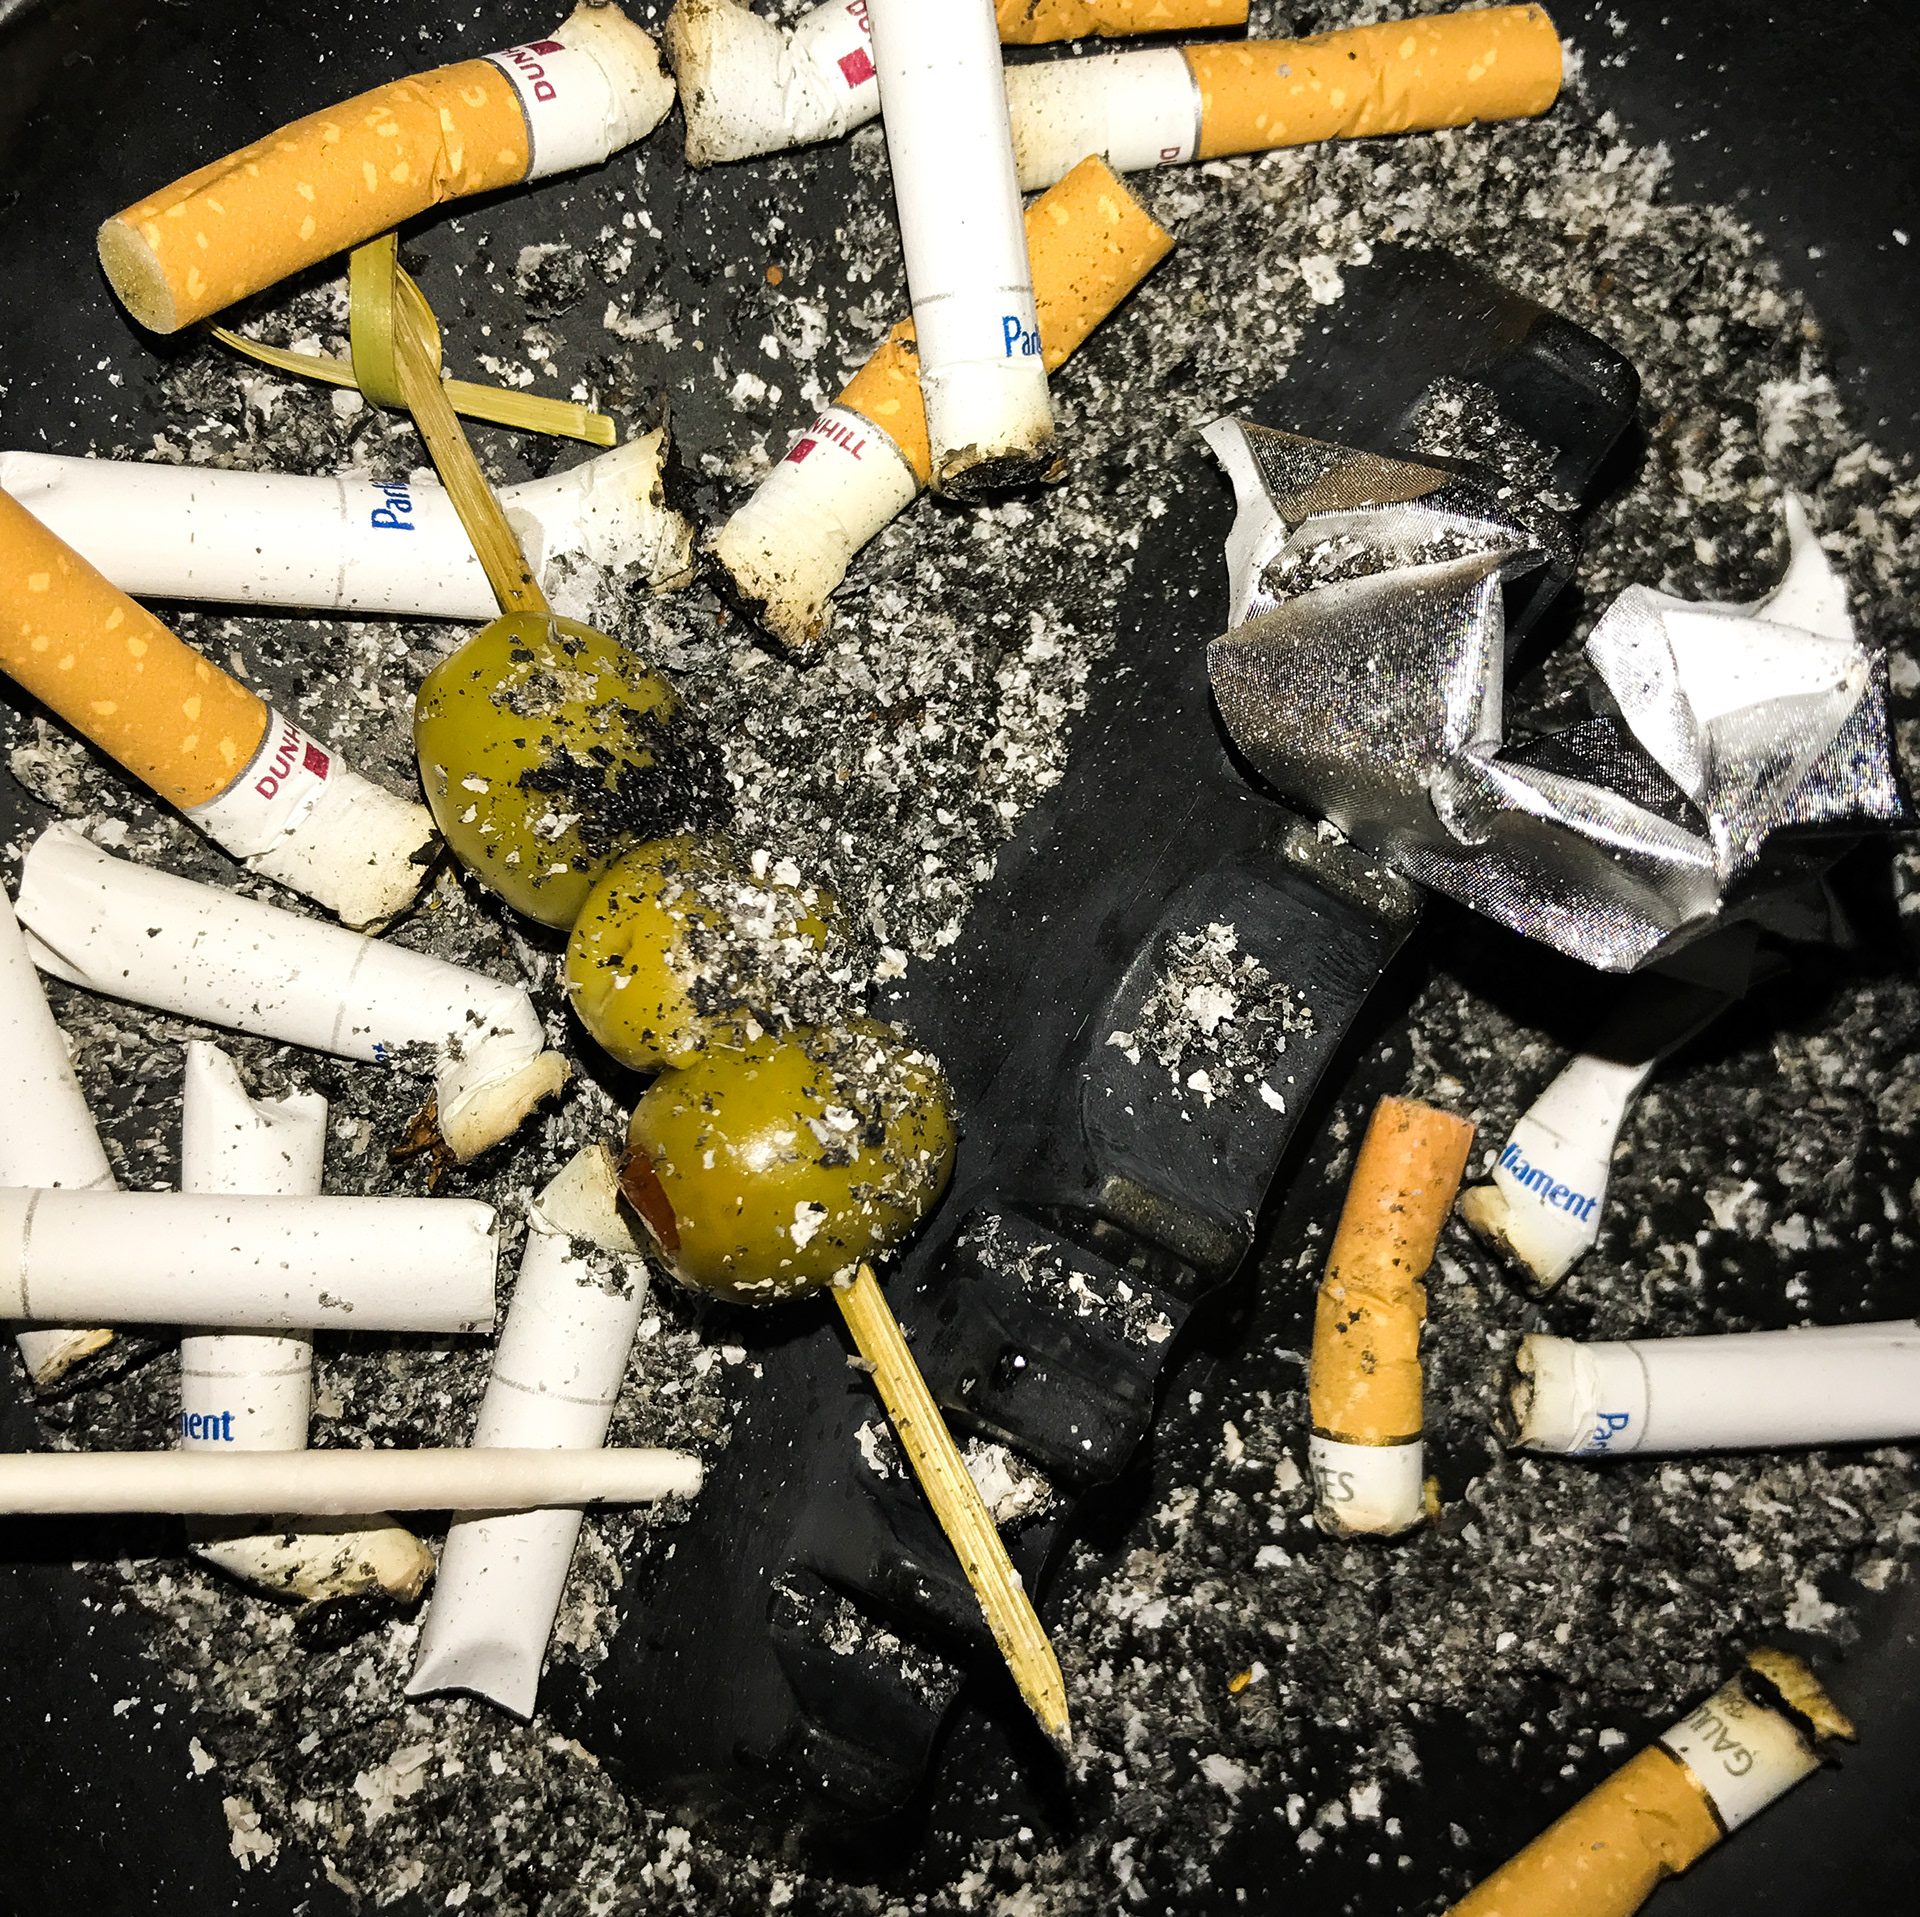
Although Eian Kantor’s subject specific photos in discarded items inspire me a lot, this photo also inspires me. Firstly, the black and white background sets the mood and the tone of this photo dark, and reflection upon water can be seen. There is also a pack of cigarettes and pair of gloves. By setting these various elements, this photo inspires me to combine a lot of factors while taking a photograph.


Statement of Intent

The title of this project is Garbage”?”.  I deliberately added a question mark to rectify my vision to say discarded items are not always an environmental threat but it can be portrayed as abstract and can even become beautiful. Actually, it is not that hard to make garbages to to an abstract structure as I learned a lot from last unit. The question mark also implies the feeling of the audience.

I want my audience to feel amazed. Throughout my last reflection unit, my photos were not as great as other images. For this time, I want to break many biases that discarded items are not clean. It will create a new impression and perception for the audience. My topic would be relatively not familiar, but it would be worth it to try. I also want show without any touches with the shutter speed or exposure (technical things) to express the natural discarded item.

I will get inspiration and develop my ideas by looking for photographs that shows specific discarded items, as I am finding for a variety of kinds. Instead of planning for specific kinds of discarded items, it would be nice to present my photographs as one line to express a lot of discarded items. I will also try to take photos (that focuses on one subject) from a different angle, as the difference of the angle can create significant differences.


Mood Board:

These photos are images I collected because it inspired me a lot. The work is mostly from Eian Kantor and Anthony Gerace.


Anthony Gerace's Seaside Towns Index - Sight Unseen

discarded items - NICKY GCSE PHOTOGRAPHY.

Anthony Gerace's Seaside Towns Index - Sight Unseen

Anthony Gerace's Seaside Towns Index - Sight Unseen

eian kantor - found sculptures


Reflect and Share

Give an overview of your design process, sharing the product & your learning

In the three science class time in the design center, me and Alex made the product and learned a lot about energy conversion. On the first class time, me and Alex gathered all the resources we needed to make our model and started to make the main part of the disc launcher. As explained from earlier blog posts,  some resources were replaced to other things because we could not find those in the design center. For example, we decided to replace the top part of the main part that was supposed to be wood to cardboard, since we could not find the precise size and wood was too thick to carve out a space to load the discs. At the last time of the first day, we finished until making the main part of the disc launcher, making a space to attach a rubber band, and sticking two popsicle sticks together to pull the disc and hit them. On the second day of designing, we carved out a cardboard to stick it at the top of the disc launcher, in order to store the discs. Additionally, we connected the rubber band to the popsicle sticks to create potential energy out of elasticity of the rubber band. In my opinion, this day was the most important day while designing this prototype since we tested out the disc launcher before we attached three individual disc launcher into one. We found a huge problem while we tested the disc launcher; the popsicle sticks could not hit the disc very well. Peers and Mr.Landrum gave me tips that were very helpful to improve on next designing class, such as the length of the popsicle stick was too long to pull tightly as I can to hit the disc so we needed a shorter popsicle stick, and the popsicle stick was wavering around the disc so we needed to fix the popsicle stick and make sure it did not move. Based on those feedback, on the third designing class, we used shorter popsicle stick and pasted little pieces of popsicle stick where the popsicle stick moved, and again tested the disc launcher by the peers. After that, we attached three disc launchers into one by using rubber band and popsicle stick. However, the x3 force of the rubber band and the popsicle stick was so strong that it needed a lot of strength to pull the popsicle stick. In general, our plan to shoot three disc simultaneously was failed; we could only shoot the disc one at a time.

Sharing and Learning:

Our model is a disc launcher, originally planned to to shoot three discs at once to hit a wide range of targets. This is a model that converts potential energy to kinetic energy, as the elastic potential energy of the rubber band  hits the disc so that it can be shot to long target. To be more creative than our inspiration, we designed to make three disc launchers.Our plans did not go perfect, as we failed the last step, but we learned that it needs a lot of energy to pull back three different popsicle stick.  Based on the learning, if we have more time to improve on this prototype, we will use stronger and durable substance to attach three disc launchers into one. Additionally, we learned a good way to replace some lack of resources to create our model. As discussed above, we spent a long time to find the exact size, substance, and texture. Although we had some problems, we learned to quickly react and resolve the problem like creating parts using different materials.

Use the rubric & your own success criteria to discuss the strengths and weaknesses of the product.

Explain how and why your toy/device meets the design specifications.

My success criteria while I was developing and planning this model is state below:

  1. Be safe when I am working on this project.
  2. I can combine three different disc launchers into a wide one.
  3. When I pull the rubber band, discs can be shot simultaneously.
  4. Rubber band does not snap
  5. The disc launcher is faster and stronger than the original prototype that we were inspired on but it is safer

I think that our model meets criteria 1,2,4, and partially 5, but does not meet criteria three. For the first criteria, we were concerned about this because we needed hot glue gun and a saw to carve out wood and cardboard to make a variety of parts to create this prototype. We managed to be safe and completed the prototype without hurting ourselves. For criteria 2, we successfully attached three individual disc launchers in to one using a lot of popsicle stick. For criteria 3, we failed on it since it took a lot of force and effort to pull the handle but it could not hit the disc launcher simultaneously. We were also concerned about the rubber band since it could snap after it was attached permanently, so that it could entirely lose its potential energy to hit the disk, but thankfully the rubber band did not snap and managed to hit the disc one at a time. For criteria 5, I think we partially met this one. One change we made while designing  the blueprint was to use cardboard disc so even though it is originally purposed to shoot targets, just in case someone get hit, it could be not painful. However, some flaw I could found while I was testing it to the peers was that if someone poked a finger in to the part where popsicle stick hit the disc, it could damage fingers critically and can impact the audience and the environment.  For improvement, we could have designed a handle to prevent that situation to happen.

Based on these evaluations, one strength I can find on my prototype is that it can successfully convert potential energy to kinetic energy, which was the original purpose. Another strength is that we considered safety problems and creativity, which differs us from the original product where we got inspired from and we could finally create our unique prototype. However, there are a lot of weaknesses that we need some improvement. Firstly, we could not meet all success criteria, which was our small goal to achieve. Additionally, we could not hit three disc at the same time, which was the most important part of our designing process. We did not even resolved all safety problems, that it can lead to hurting the intended audience who are not mature yet, and affect the environment negatively as it can make the audience to carelessly shoot the disc to people.

Other reflections: What are you most proud of? What was most challenging?

I am proud that we managed our time very well that we completed this designing project earlier than other groups so we could improve on our project faster. One challenging part while working on this project was improving on problems, because those were unexpected and we could not reverse the whole process. In conclusion, I think we made a prototype that met most of the success criteria, and I am satisfied with it.


Create and Improve

  1. Reflect on your prototype. What were some strengths? What needs refinement?

Our prototype mostly relied on the blueprint from the previous blog post, but it did not actually completely fits in with it. Firstly, the disc holder (that literally holds a lot of discs) that was purposed to be carved out of plastic was replaced to a card box since I could not found plastic that fitted with the size of the disc. Another change we made from the blueprint was the number of wood plates. To make a space for the disc to stay stable, I needed 2 wood plates per one set of the disc launcher. Again, I could not find two same wood plates, and even there was one, I could not cut the wood to drop the disc in. That way, I decided to cut out the top part of the disc launcher by using card box.

STRENGTHS:

Velocity: One strength of our first prototype was that the rubber band held a lot of elasticity. Since the rubber band was attached on two popsicle sticks, it could maintain huge weights and hit the disc with a high speed.

Durability: The only reason I planned to make the main part of this module was to increase its durability. While we was attaching the top part(Card box) and the bottom part( Wood), the box part was too fragile. However, after it was attached with a glue gun, it became harder.

Safety:

To emphasize the safety of the module, as discussed from the previous blog posts, I changed the plastic discs to a card board disc.  Even though this disc launcher only used to shoot targets, just in case, I took care about safety.

WEAKNESSES

Accuracy: One weakness that was made from the first prototype was the accuracy of the disc. It is not the problem of the disc but the length of the popsicle stick and the area of the space created from the width of the wood plate. That way, the popsicle stick wavered around the disc and could not hit the disc well. Additionally, there were some cases where the disc was jammed inside the module because it was hit on the wrong direction.

Effectiveness:

What I mean by the effectiveness is how many energy to I have to plug in to create single action. For our prototype, it was very difficult to pull three launchers simultaneously because it needed a lot of force. That way, it took a long time to shoot and reload and thus it was very laborious.

Design: Finally, last minor weakness that this module have is design.  Although it converts energy well, it does not seem like a toy. However, this is only a small weakness that other prototype holds too.

2.Outline the feedback you received from peers. Share some changes you will make as a result of this feedback.

As discussed from the last question, when the prototype was tested by other peers, one person mentioned that the disc is very difficult to aim, so it can hit the target accurately. That way, what I am trying to do is to block the empty space of the popsicle stick by glueing another popsicle stick. As can be seen from the photo below, the popsicle stick is now fixed and able to shoot.

Additionally, another problem I found by testing to the peer was that the disc does not launch simultaneously. I would fix this problem by changing the last handle to more durable one so that it is not fragile and can swiftly pull three rubber bands at once.

3. Include photos of your prototype and details of the feedbacks received.

(I could not take photos while I was designing this prototype)


The black circles were refinements we made after we tested with our peers. We cut small pieces of popsicle sticks and stick it to the side of the big popsicle sticks. That way, we could shoot the disc more swiftly and easily since the big popsicle stick did not budged a little.


Develop and Plan

Explain how you used design thinking practices to arrive at this iteration of my device.

I wanted to be creative when I designed a blueprint for the disc launcher, and decided to combine three launchers into one. I thought that I needed longer rubber band to attach all three launcher into one, and considered how many discs I should put in the magazine ( plastic cylinder, in this case).  That way, as can be seen from the photo of the blueprint, I could connect three launchers using high-elasticity rubber band and wood popsicle sticks

Share your design concept.

This is the photo of the blueprint I designed:

Although it can be slight confusing, the materials I need are:

6 wood plates(10cm tall): I need these wood plates to create fortified main body of the disc launcher, the reason why I need six wood plates instead of three is because I need two layers of them in one disc launcher in order to stick the popsicle sticks between them.

9 popsicle sticks(12cm tall): Popsicle sticks have a crucial role in this device because it enables this launcher to shoot. I have to plug in two popsicle sticks between the two layers of wood plate, so I can pull and push the popsicle stick when I want to shoot.

3 plastic cylinder(6cm tall): I need three plastic cylinders to fill and hold the discs. I need a place to hold the discs, like the magazine does in real gun.

9 rubber band: The rubber band is where the potential energy comes from in this device. Rubber band contains strong elasticity and therefore can shoot the discs powerfully. I have to attach the wood plate and the popsicle stick with the rubber band so the disc can be shot. Additionally, when I have to combine three different disc launcher, rubber band can tie them into one.

1 saw: To attach the rubber band on the wood plate and the popsicle stick, I need to make a space to hang it. That way, I decided to cut off some part of the wood plate so it makes a gap to hang the rubber band. I need a saw to cut wood.

1 glue gun: Glue gun is widely used to stick two things together, and in this case it can glue two and three popsicle sticks together. Firstly, I need to fit in two popsicle sticks in one disc launcher to create a space to attach a rubber band. I thought that using a glue gun is a more effective method to combine them together.

Cardboard Discs(0.3cm tall): The cardboard discs are material needed for “bullets”.  I can fill 20 of those discs inside each cylinder.


Develop a detailed plan for creating the preferred design, including success criteria


Firstly, I plan to use materials that are all equal in shape and sizes, to prevent situation where some materials do not fit. My second plan while I am designing this toy is making one disc launcher at a time rather than attaching into a whole. If I make mistakes while I am making the first disc launcher, I can easily revise the problem and  learn how to make it accurately while I make another launchers. However, when I first put in three launchers together, the prototype would not be precise. My third plan is to find a rubber band that contains more potential energy. This means that it have stronger elasticity and can swiftly shoot the disc without pulling it hard as I can. That way, I can reduce the chance of snapping the rubber band. My third plan is to attach the wood plates and the popsicle sticks stronger. I want to make this device that is not prone to damage, simply do not want it to break.

The goal of designing a disc launcher can be considered as a success when I achieve the following criterions:

  1. Be safe when I am working on this project.
  2. I can combine three different disc launchers into a wide one.
  3. When I pull the rubber band, discs can be shot simultaneously.
  4. Rubber band does not snap
  5. The disc launcher is faster and stronger than the original prototype that we were inspired on but it is safer

Researching the Starting Point

MY Starting Point: Reflection

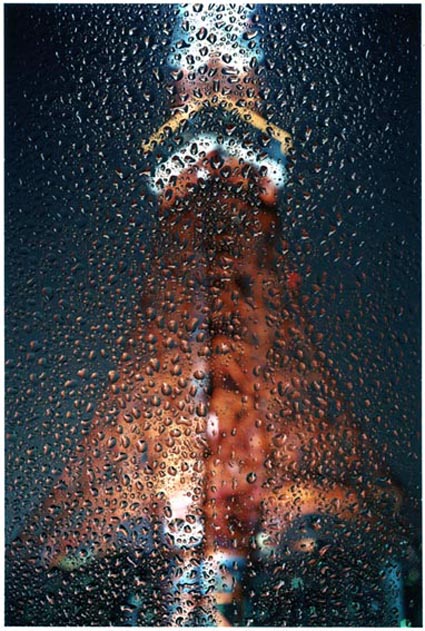
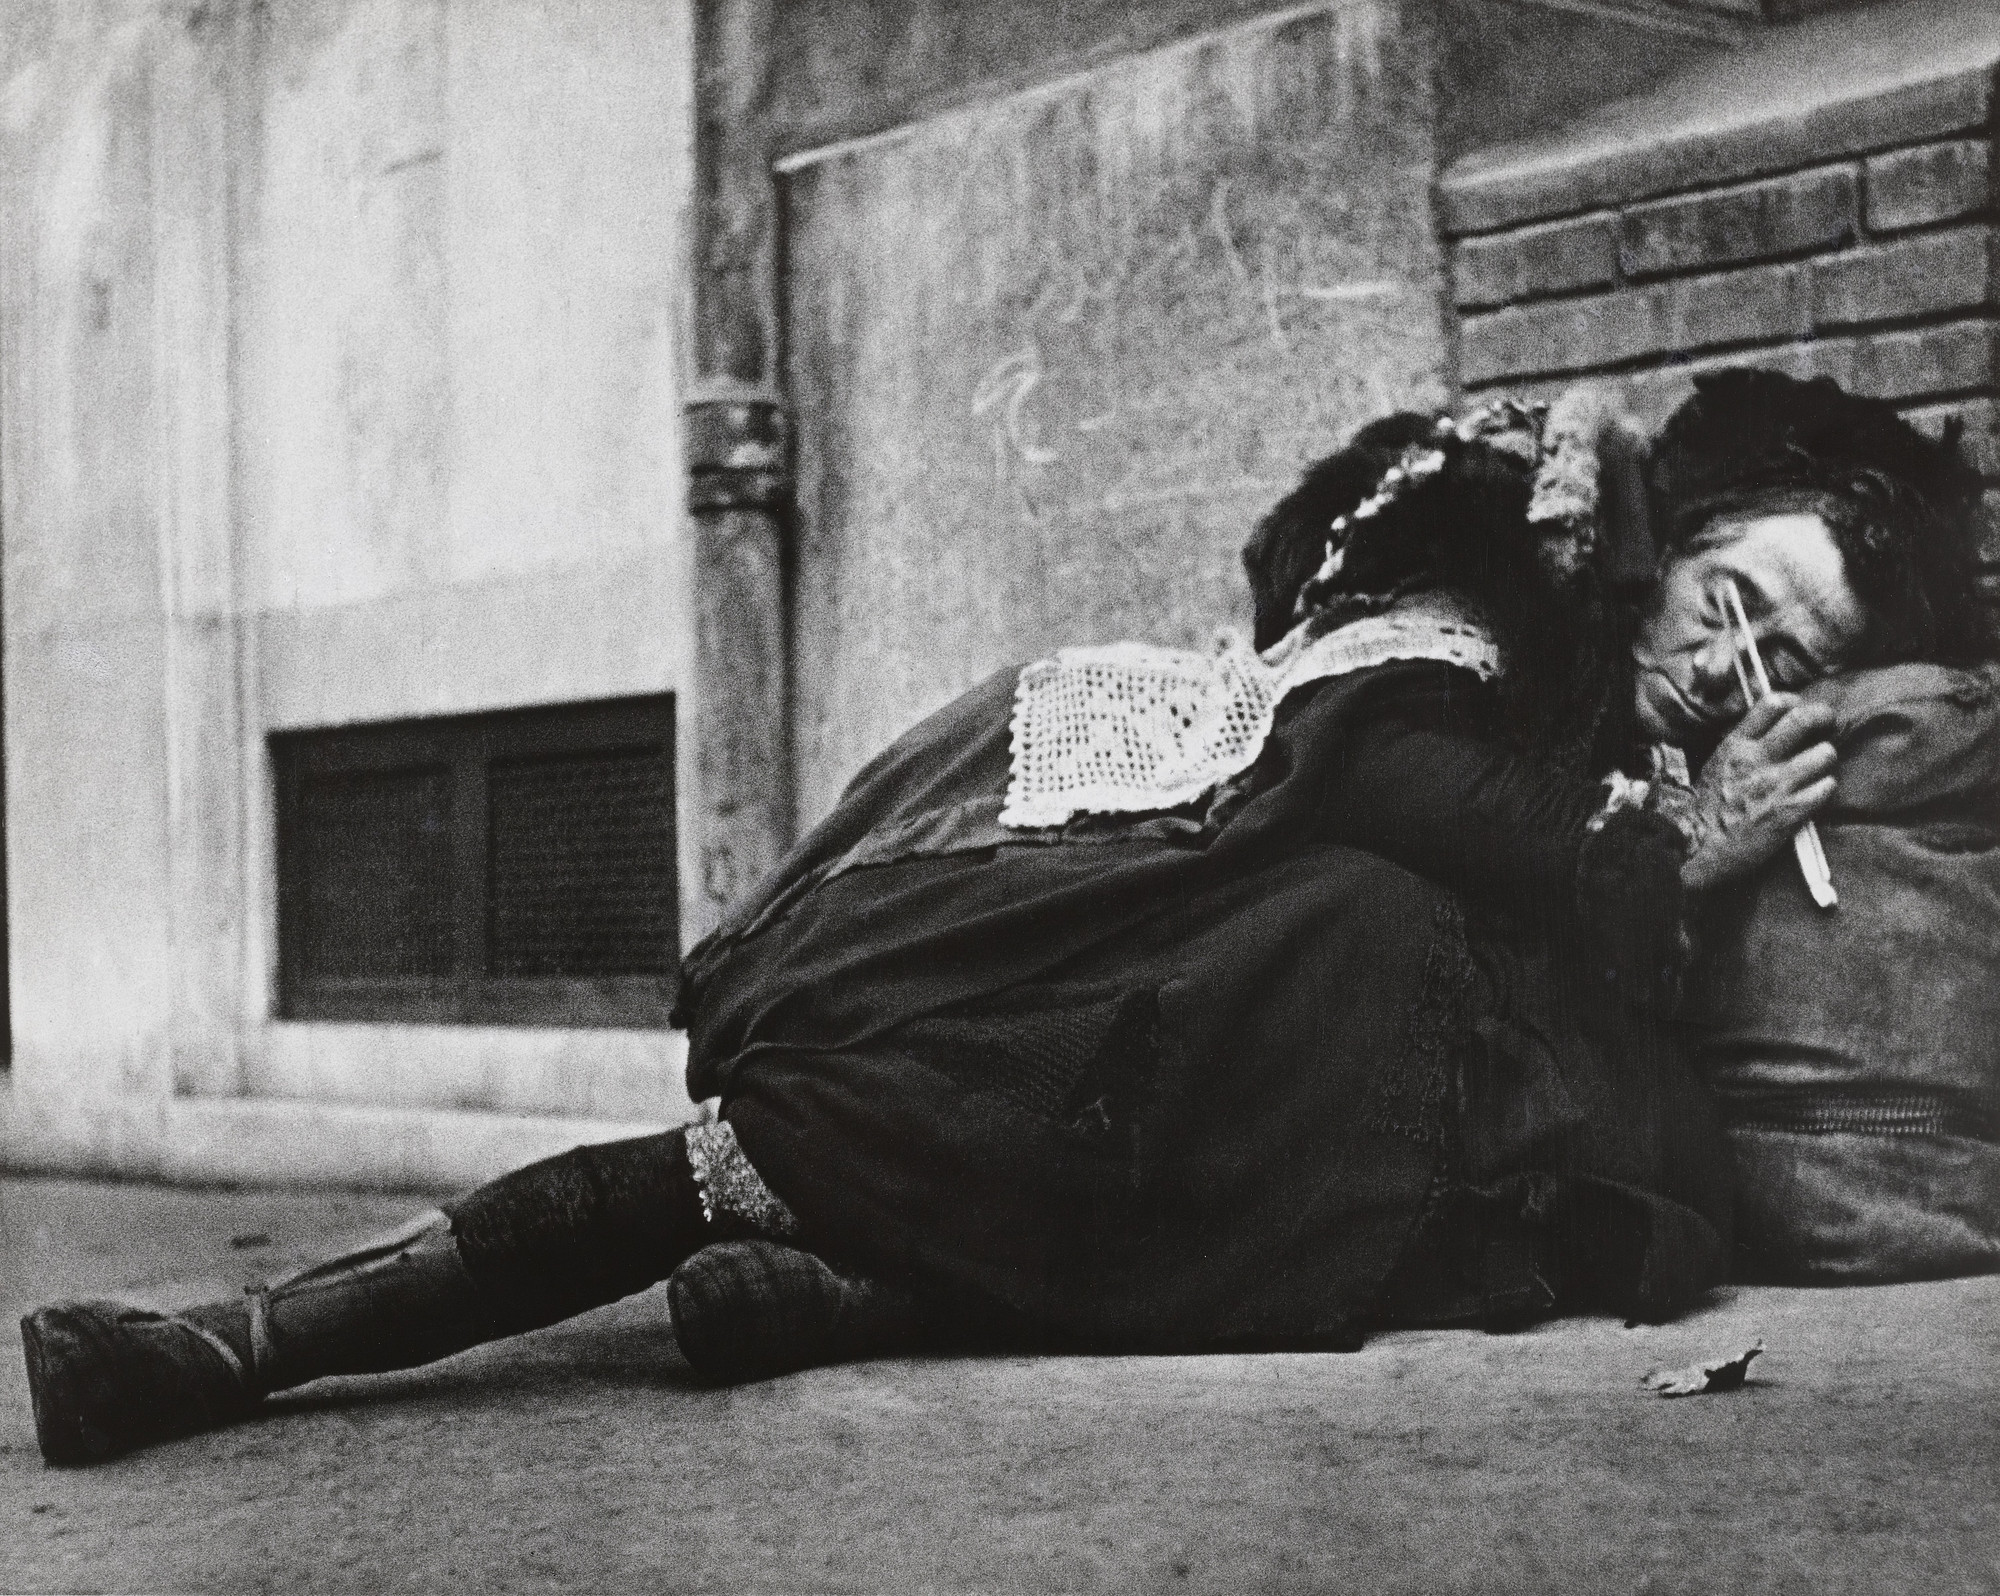
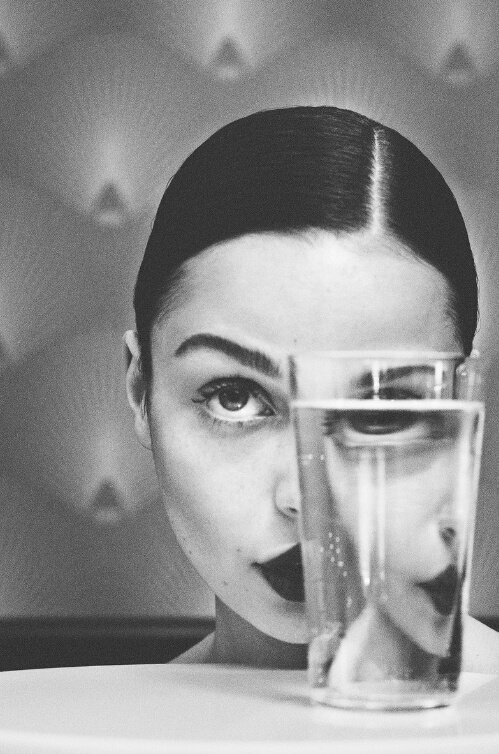
I focus to take pictures that are literally dark. One reflection idea that I have is shadows. Lee Friedland took photos utilizing the light and creating shadows to make the images abstract. That way, it can make creepy background on images. Naoya Hatakeyama has used continuous repetition of one shape, for example water drops, in order to create special views for the audience. The blurry background creates an interesting impression to the audience as it makes the subject abstract. Similar with Lee Friedland, Lisette Model also used black&white image technique in order to emphasize person’s thoughts and emotions to create sympathy to the subject. A person lying on a street and the black and white technique can make sad feeling. Antonio gutierrez Pereira has used reflection upon water glasses to create unique shapes of a subject. The subject looks very strange, but the water and glass literally reflects the subject so it looks amazing to me and gives inspiration. Lastly, Robert Holden took photos that relates with the burning house project: things to take when your house is burning. These photographers would help me found a starting found, since most of the artists usually take black & white photos. For me, I want to combine Robert Holden and Lee Friedland’s reflection upon shadows and subject’s personality. In my opinion, it is important to emphasize my identity, especially portrait what I adorn and care. Since I got enough inspiration by these photographers, I want to take pictures that shows my own, personal identity. I might even use the dark room for the background.


Lee Friedlander, Photographing the American Psyche

Naoya HATAKEYAMA | Taka Ishii Gallery / タカ・イシイギャラリー


Lisette Model | MoMA

Ksenija on Twitter: "Antonio Gutiérrez Pereira #photography https://t.co/xhy31GgjLM" / Twitter

the burning house project – robert holden | Art She Hearts

Identity Project Set 3

This time I made an additional set that contained my identity. Thus, I focused on written texts and books this time.

Identity Project Set 3 All Photos.      <- This is a link for all photos


Below is my red selection of four photographs, which are first, second, seventh, and tenth on the above link if you want to see in a better quality.


Artist Analysis:

On this set, I did not change my identity but change my subject when I took photos. That way, although I did not have to, I felt the need to find another artist to analyze. The photographer I found was Tom Teodosijev. His unique feature and way to take is photos was that he organized the objects in one space and and had portraits without people. That is the significant similarity that can be found in Teodosijev’s photos and mine. By taking photos that does not need people, he can emphasize his identity more clearly and can additionally attract the audience with objects that are sorted out of each other. Another aspect that I can notice from Tom Teodosijev is that he does not only present his photographs in one or three images(triptych). He generally presents a set of images (according to the vision and inspiration ppt there were eight images) and creates abstract beauty. I got inspired by Tom Teodosijev that I decided to work on this set without a person to express my identity and take photos of objects. Although it can not be considered as a perfect way to demonstrate my identity, I used photos of different written text, and I would plan to present the image with 4~5 images. When I observed Teodosijev’s photos of each image carefully, I also found out that objects that were in one rectangular storage contained objects that related with each other with the same topic. For example, one storage photo contains objects such as markers, pens, scissors, colored pencils, and even tape, which all can be related with the topic art. By sorting out the storage with equipments that related with each other, it did not create an unacceptable impression from the audience since they thought “Yeah, those stuffs should be there,” and continued viewing other storages. I also wanted to create the same effect, if possible, that Teodosijev created since it was very interesting to notice how he tended to show his own identity by organizing random objects into a box. I felt that I could do that action properly in terms with books, such as comparing two-language written bible at the same time or taking photos of a dictionary which is able to translate up to four different languages to demonstrate my unique identity: internationality.


Evaluation:

As stated above, my identity was originally international aspect of myself. Unlike Set 1 and Set 2, which I took photos of coins, this time I decided to take photos of written text. Out of ten images, I chose my best four photographs as my red selection since it applied strongly to me. The first image I took was a red placard to celebrate year 2023, the year of rabbit. When I observed the text written on the red card, I noticed that there was some international text that had a sense of humor. In the text, it stated that “NICE 兔 MEET U” which seemed to have an international aspect. The character 兔 means in Chinese, rabbit, and is spoken as tu in Chinese. That way, the text is actually “NICE TO MEET U,” but also explicitly state that it is the year of rabbit. I thought that it was a collaboration of both English and Chinese text, so it made it through the red selection. The second photo in my selection was my books. There were lots of books, but the text type was various. For example, there were some Korean dictionaries and some English novels when I looked at the tile of the books. Multifarious types of books that war written in diverse languages are a perfect way to show my international identity that I have been to many countries and fluent in handful languages. In the third photo, I took photos of two bibles. I am a sacred Christian, but some people could think that there are no relevant information that shows my identity. However, one is written in English, and one is written in Korean. I feel equally the same when I have to read some text in church. Similar with the second image, the third image also reminds me of my international identity that it is diverse. Lastly the fourth image I took have one more language added: Japanese. As a son of a diplomat, I was “nomadic” and moved countries over countries every year or two. That way, I naturally learned each countries’ cultural differences(also mastered a lot of languages) and adapted quickly.  I generally think that the fourth photograph is the image that portraits my identity the most. The subject in this photo is a multi-language dictionary. When I am, for example, reading a book, and does not know what the word meant, I search it up on that dictionary. This dictionary helped me a lot when I encountered hard words and boosted me up to have a strong vocabulary when I speak Korean, English, Chinese, or Japanese. Overall, the four images and the remaining photographs I took showed exactly what identity I have and expressed it properly.


Identity Project Set 2(Studio Work)

In this set, I used the studio in school in order to emphasize my identity. Josh Ding agreed to be my model when taking the photographs, so I made a triptych from the photos that I took from he studio.

Identity Project Set 2Identity Project Set 2(All Photos)


My Red Images:


Artist Analysis: Harry Houdini

I was inspired by the artist Harry Houdini while I was taking photos in this set. Harry Houdini is known famously for his tricks as he was both magician and a photographer. That way, when I observed his photographs, I noticed his body was covered in metal handcuffs which were hardly locked, maybe to express his magician identity. He was the subject of his photos, and used black & white background to provide emphasis on himself. That way, it gave me an inspiration to insert my identity on to subject’s body and directly describe it as my identity. Another feature that was notable from Harry Houdini was that he had many poses when taking photos. What I mean by that is Houdini tried out many poses to make a perfect posture and settings for the best photos he could use to express his identity. The image I was most inspired from Harry Houdini was the Image below. When you compare the image below of Harry Houdini and my photographs, I can observe that those to have unusual items stuck on a piece of clothing. In the image, below, although it is difficult to fully comprehend what the object is, it seems like to be badges earned as a magician and specially represents his own identity. That way, I tried to portrait my identity by taking photos that were similar to Houdini’s photos.


Evaluation of my Studio Work:

The most direct aspect that can be found in my photograph is the use of various coins. In the middle image, there are coins top of one’s hand, and on the side images, there is Josh wearing a mask that have coins taped there. This demonstrates my international identity through these coins. I wanted to express that these identity follow me where ever I go, so I embedded coins on important items such as hands and mask. My identity only have one particular aspect and that is international one. I thought that the best way to express variety of culture was to use different currency of each country. That way, I could find different shapes and colors of coins and could make the photograph look more abstract. The reason I used black background while I took photos was to emphasize that white mask more focused to the audience and again feature my identity. I also utilized the light while I took the photos in order to reflect light of the coin to make the coin more bright. My model Josh had tried various posture to locate the mask on various locations; and I thought that placing the mask on the higher part would make the triptych more beautiful. The photo of Josh’s hand was to also emphasize my identity; it is rather very obvious. I could have just used three photos of the coin mask to make a beautiful triptych, which could be have the same topic as the examples that I saw. However, I inserted the photo of hand on the middle of the triptych so that way I could interest the audience with a new perception, rather than three repetitive images which can make them somewhat boring. I thought that inserting a photo of hand with coins on top of it could both stay on topic and keep intrigue the audience.

Identity Project Set 1

My Red Images(Photos):

Out of 10 images I took before/during the winter holiday, three photos were my best, red selection.  These photos best relates with my international identity project. The first photo is an enumeration of my coins that I collected around the world. As you can see above, there are a lot of layers consisting of wide range of coins. It also makes this photo more abstract since it is taken in various layers; the different shapes and sizes further emphasizes the international identity of myself. I could not find any photographers who similarly tried to take photos of objects, so I made a new genre of identity photos.  One of the main reasons that I chose this photo out of other ones was that this looked the most beautiful in terms of abstractness. Photographs that feature one’s identity are sometimes creepy and dark, which loses beauty. However, this photo luckily contained multiple floors to provide more attractiveness in the photograph and created good-looking aura. The second image I took was also containing three coins. However, this time I had a different topic than the first one. In this photograph, I intentionally took photos of the tail-side of the coin, which had various animals. For example, on the tail-side of the U.S. quarter($0.25), there was a picture of an eagle. I did some research and found out the fact that the bald eagle symbolize the supreme power and privilege to the citizens of U.S. That way, I recognized that some animals that were printed on coin could represent something significant in their country. Similarly,  in a Croatia coin, which uses Kuna as a currency, there was a fish in the 1Kuna coin. I found out that the fish is a symbol of Croatian monetary history. The third photo I took is very simple; it is just of mixture of coins I collected from the past. This is the most simple and direct photo that can describe my variety of international identity. There are different colors, shapes, and textures that creates abstract nature, like my first photo does. But the unique feature that differentiates the third photo with the first photo is that the coins are laid out as a whole and emphasizes the variety of coins there.


In below, there are my 10 photos


Older posts

© 2025 Joseph

Theme by Anders NorenUp ↑

Skip to toolbar