Candy

"I have no special talent. I am only passionately curious" - Albert Einstein

Choices Choices Choices

Initial thought

my initial thought for this project is to advocate the protection of ocean animals through messages. I will be taking my photographs in the studio, and i will be using props, lighting and camera techniques to achieve my purposes. I was then inspired by the photographer Mandy Barker who spent years focusing

on ocean plastic debris and the ocean animal protections. However, i dont have access to ocean and therefore, i decided to use my model to represent ocean animals and i will be taking pictures in the studio.


What will my message be?

for this project, i want my audience to feel like being inspired and are motivated to stop wasting resources to better protect the ocean animals. The audiences should be able to interpret lots from my images and are eventually inspired and advocated to protect the animals.


How will i show this in my photograph?

For this project,  i will be using a “model” to repre

sent a ocean animal, who is suffocating and dying from the ocean debris(plastic, rubbish etc.) I will be using a blue lighting and reflect it to the white background, and this is to achieve the feeling of ocean. I will also be utilizing a slow shutter speed, which is to make the floating plastic more vague whereas the model being clear.


Artist research – Mandy Barker

these are some photographs from Mandy Barker, who is an photographer that demonstrates the plastic debris and the pollution within the ocean. These debris formed cool shapes that made the construction of the image looks fascinating. I was fascinated by the images as it does not only limit to ocean debris but can also be related to space debris. This inspired me to take pictures of how the ocean animals are suffocating under the extremely large amount of plastic floating on/in the ocean. Furthermore, my purpose is also to advocate and promote ocean protection to save animals.

Analysis of a particular picture

this is a picture took by mandy barker that illustrates plastic debris. All the plastic together forms a shape of circle, which is really cool and gives a feeling of being stared by eyes. The colour is really light, which contrast with the black background colour and emphasize the colourful plastic. This also indicates how despite being so colourful and beautiful, it is still dangerous and venomous to ocean animals.

Yellow Photos

these are my Yellow

these are my yellow photos for set 1. I have carefully used props (plastic bags and rubbishs) and adjust the colour to create a sense of feeling like ocean. The reason why i chose these photos are mainly because that they’re in focus, and the atmosphere in these photo tend to fit in the theme of what i want to present. In the pictures that were took later, there is a tattoo on the model’s face. This is because that oringially except for the background colour which could be a representation of ocean, nothing else is used to indicate the “ocean animal” part. Therefore, i asked art teacher to made a tattoo on the model’s face, which is a whale in ocean. This further contributed to letting audience better understand what is the topic of the photograph and added more aesthetic towards the picture.


Green photos

these are my green photos for set 1. The way i selected these photographs is by eliminating the ones that does not have a clear focus point or are shot badly. For instance, i’ve elimated all the ones that are a bit blurry, since my shutter speed in quite low and when the model moves, the picture becomes blurry. Then, i’ve also elimated those ones where others are in the photograph. This is because during the process of taking the picture, I’ve asked several people to help with throwing the plastic bag, and some people photograph accidentally included those poeple inside.


Red photos

these two are my red photos. I chose these two photographs specifically because they are the best demonstration of my topic – ocean animals’ sufferation. These pictures are clearly in focus, and there is no others included in the pictueres. For both of the pictures, i’ve used a quite low shutter speed in order to capture the vagueness of the plastic bag. However, the mdoel is kept static so she can be in focus. Furthermore, the emotion presented by the models are all suitable. The emotion in picture one is more like upset, worried and sad. Whereas the emotion in the second picture corresponds with the image’s title “let us breathe” as the model looks suffocating and dying.


SET TWO


artist research J Henry Fair

J Henry Fair is a photographer who is interested in taking pictures of pollution. In his photograph, there’s trait of air pollution, water pollution, ocean pollution etc. Among all these pollution, the one that inspires me the most is ocean pollution, as i want to make connection between the first set and the second set. Therefore, after researching about him and his photography, i’ve discovered that he did an amazing job at utilizing the colour to create a sense of mixture that conveys the meaning of pollution. Therefore, i further developed this idea into my own set. However, what’s different about our pictures is that his photograph are taken mostly in reality and abstract, whereas my photograph is created through the utilization of studio lighting, colour mixtures and others.


2

this is an example of J Henry Fair’s photograph. In this picture, we can clearly tell that he conveyed the meaning “pollution” through the utilization of colour mixture and structure. In this picture, the background colour blue represent the ocean, and the light red represent the pollution. The bright red contrast with the dark blue behind to emphasize the pollution, further indicating how damaging the pollution is to environment. Furthermore, this photograph is not fully straight, making it more like a 3D photograph. This on the other hand can let the audience think of earth, which has the same colour and shape.

This picture inspired me to use colour mixture to represent pollution


Yellow Photos

.

these are my yellow photos for set 2. In this set, i planned to use a box that is fulled with water and place it under the studio light which is adjusted to ocean-like colour. Then, i borrowed black paint from art and pour the pigment in, the black pigment is used to represent the pollution. I have elminated all the test shots, which are token to see the colour. And i’ve also eliminated ones that are out of focus or the ones that are repreated. (because these pictures are taken with continous shooting)


Green photos

these are my green photos for set 2. For the green photos, i’ve eliminated ones that have bad focus. And because that this set is shot is continuous shooting, there are a lot of identical pictures, so i eliminated them all. Furthermore, my aim is also to select pictures that have captured the pouring process and also when it is slowly dissovling in the water. And i’ve also eliminated ones that are bit blurried due to slow shutter speed.

Red photos

These are my red photos for set 2. I’ve eliminated all the ones that cannot convey my topic clearly, which is ocean pollution. And i’ve utilized 3 pictures to show the process of ocean being polluted. With the first image the pollution being poured, the second image the pollution being spread, and the third image the pollution has contaminated the ocean.

Reflections

Initial thought

my initial thought of this project is the reflection of eyes. I’ve always been fascinated by the beauty of eyes and once I heard the topic, this is what appeared in my mind at first. After doing research, one of the photographers that truly dragged my attention is Suren Manvelyan. She’s an animal photographer who usually takes pictures of an animal’s eye and demonstrates its beauty of it. In order to take pictures like that, I will need to utilize a macro lens to zoom in on the pictures and make the eyes in the frame. My photograph will show a person’s eye with a reflection of me holding a camera inside


What will your message be?

The feeling i want my aud

ience to have while looking at the picture is fascination and surprise. This is because firstly, while speaking of reflection, every few people will think about reflections of eyes. Therefore my idea for this project is unique and surprising. Furthermore, if my photograph has achieved my ideal thoughts, it should be fascinating. This is because the picture should demonstrate the beauty of eyes and the photographer hiding inside simultaneously, which is supposably cool and unexpected.

How will you show this message with your photography-

The eye of the model will fill the picture, and I will be using a camera with a macro lens that can zoom in and focus enough to illustrate the beauty of eyes. Furthermore, the picture’s quality should be high enough to show the details inside, and the lights should contribute to the reflections that shows the photographer. Additionally, if i failed to take pictures with a reflection of photographer, i will use photoshop to ps the person inside the eye.

Compare each of your favorite images to the others.

1

what i really like about this picture is that it has made use of reflections as well as fully demonstrated the beauty of eyes. I have always been fascinated by eyes, since i believe that they’re the most crucial organ that presents ones emotion. Furthermore, this picture’s focal point is in focus, which allows the audience’s attention to be capture directly into the emphasis. The surroudings are slightly unfocus, but it contributed to the draging attention process. Additionally, to show reflections, this picture has also specially utilized lighting. To take pictures of eyes that shows reflections, photographers have to make use of lights so that it wont hurt the model’s eyes and shows reflections at the same time.

2This picture has specially made use of lighting to achieve cool effects. Firstly, the model is placed symmetrically in the center so that the left and right sides are totally identical to each other. However, the different color of lights for both sides has contributed to the expression of multiple emotions. The left side made use of red, which generally symbolizes hope and warmness. Whereas the right side utilized blue, which symbolizes coldness and evilness.

Conclusion

After analyzing these pictures, i found out that i have a tendency to love pictures that make use of lights, whether can or cannot be seen. I also tend to love pictures that can express different emotion and shows a sense of contrast.


Artist – Suren Manvelyan


These are the photography token by Suren Manvelyan, who is a woman photographer taking pictures particularly for animal eyes.  Her photographs truly demonstrated the beauty of eyes after magnification.  When i look at these pictures, I am feeling fascinated by the beauty of eyes and as well as shocked by her photography skills, since it is really hard to capture these pictures from those moving animals. Furthermore, if i kept on looking at these images for a long time, I have a feeling of astonishment since the structures within the eyes looks like spider webs. Moreover, other than demonstrating the beauty of eyes, i believe that her goal was to also illustrate how complicated the eye systems are and how many neurons it contain.


Analyse a particular picture


Visual

This is a typical picture photograph by Suren Manvelyan. Its focal-point is in black hole that is intentionally placed in the middle of the picture. This picture only contains the eye ball of an animal, which makes the audience’s attention to stay on the eye ball since there aren’t any distractions. The side of the picture has been deliberately darken to contrast with the colourful eye ball in the middle, and the colourful structure looks like volcano with a black hole inside. This picture is also tilted but symmetrical, with similar structure at the side and black hole in the middle. The angle of the image also contributed to make the picture more 3d, since the picture looks protruding. The neuron structure at the side looks higher than the rest of the picture, where in the middle it sinks and eventually formed a black hole. The texture looks furry and sandy, and it looks like spider web.

Technical

For the picture above, I believe that the photographer has made use of studio light. This is because taking such pictures using macro lens genuinely requires good lighting, and natural lights are barely possible to achieve this effect. In order to capture all the structures and neurons within the eyes, it is necessary to use a macro lens. and the aperture should not be really small so that everything in the picture can be in focus. The shutter speed of the picture must be fast enough to capture the animal’s eye ball before it winks or runs away. ISO should be kept exactly the same everytime, and the white balance of the camera should correspond with the lighting ones. This picture inspired me since I’ve always been fascinated by the beauty of eyes, and the structure within the eyes can reflect lights, which links to the project reflection.


Statement of intent

the working title of my project is u and i, and i want my audience to feel fascinated and surprise while looking at the pictures. I will also get inspirations and develop my ideas by looking through photographs by suren manvelyan that shows different pictures of animal eyes.


Yellow photos

these are my selection of yellow photos, which is in total 44 pictures. I’ve in whole took pictures of 15 people’s eyes, which has a large range of age, and contains both woman and man. The reason why i chose these pictures is that i will select some pictures for all the individuals that i took, and these one have the best characteristics of what i want. For instance, all of these pictures fits in my project “reflection”, and most improtantly they’re all in focus. Furthermore, most of the picture has a clear vision of the eye, despite that a minority of them doesn’t show my reflection inside.


green photos (parts of it)

These are parts of my selection for green photos. When I’m choosing through green photos through yellow ones, my goal is to eliminate those that is not very related to my project “reflection and ones that have bad lightings. Therefore, I chose pictures that shows reflection of my hands and the camera, ones that are in focus, and ones that have good ISO and not too exposed. Additionally, I have also kept at least one photo for each person so i can ultimately have 14 people’s eyes at the end.


Red Photos

these are my red photos. In this step, I have carefully selected all pictures with best lighting and exposure, best angle, and the ones that are focused most correctly. These pictures are all different at first, but then i decided to crop them into similar size and therefore they are all basically identical in size. Furthermore, i decided not to change the exposure since they were took in different angle and thus have their own features.


critique of red photos

In my red photos, the majority of the space were occupied by eyes. The exposure and the use of lights are slightly different in all the pictures and some photos contained other elements, for instance, hair. These pictures makes me feel shock and fascinated about how beautiful the eyes are and how it can reflect object despite being so small. It is also really interesting to see how the neurons and organism works within the eyes. The pictures work all together as the eye balls are in the center of the picture, which capture the audience’s eyes first and communicate my idea-reflection and the beauty of eyes. Something that worked well for this is the reflection shown through eyes. The light and the macro length worked together to make the eyes show reflection of me, and it came out pretty obvious and well.  I used a macro length and side light for this project. I put the light beside the model and made the light goes straight into his/her eyes. They should be in the same angle and height, and the white balance should also stay the same.  Something i need to develop more is to keep all the exposure the same. Now that the picture all have different exposure and lighting, which makes all of them look different. However if i want to keep all pictures similar, i should try to keep everything (the exposure and lighting) similar.


SET TWO


artist research Sebastian Magnani 


Sebastian Magnani is a photographer who enjoy taking pictures of reflections. His work mainly focused on demosntrating the difference of weather or season using a mirror. When i’m looking at the images, i feel fascinated and i can feel the beauty of nature. This is because first, his pictures are mainly symmetrical, and the mirror usually occupies the middle of the picture. Furthermore, different picture appeals different emotions to me. Since different pictures have different subject, for instance, summer gives me a feeling of hot and sweat, whereas winter gives me a feeling of cold.


the light is balanced through the whole picture, and every part of the picture is in focus. This picture is symmetrical and the line can be crossed and have the four section basically identical. The mirror occupied the middle of the picture, which capture the audience’s eyes first and drags their attention. The brown colour contract with the blue mirror which helps the mirror to stand out more. The background has a texture of something more rough, which is because the leafs represent autumn. the picture within the mirror demonstrates spring as a contrast, which can both be tell from the light colour as well as the tree inside. The lighting in this picture is just normal day light, and the aperature must be big enough to keep the whole picture in focus. Moreover, the shutter speed is probably average as nothing moves and nothing is blurried.

This image inspired me by demonstrating how i can show contrast using a mirror. Which communicates to the audience two different emotions within a singular picture. I’ve utilized this skills in my own photography but changed nature to human emotions.


yellow photos

these are my yellow photos for the project “rorrim”. I took around 100 photos in total, and I’ve selected pictures that are in focus, editable and with good lightings. These are some basic rules for photography that I’ve applied to my yellow photos. However, these photos are still just a prototype as i need to further photoshop them together to make my final red photos.


green photos

these are some of my selection for the green photos. While transferring from yellow photos to green photos, my goal is to eliminate those who have bad focus, bad lightings and the ones that are hard to photoshop. Therefore, I’ve chosen pictures that can be photoshop and are looking at the mirror. Furthermore, I’ve also eliminated the ones that cannot tell my purpose.


Red photos

these are the selections for my red photos. While choosing it from my green photos, I’ve intentionally eliminated ones that couldn’t convey my purpose clearly and the ones that are focus wrongly. This is because that there are 2 focus point in the picture, the first one is the person out of the mirror and the second one is the person within the mirror. Furthermore, for this set, i need to use photoshop to create the final effect. Therefore, I’ve eventually chosen the ones that fits the basic photograph criteria and the ones that convey my purpose clearly.


Final


research questions about portraiture

GIVE EXAMPLES OF PHOTOGRAPHS /PHOTOGRAPHER’s WORK to help reinforce your argument. See assessment criteria – for mastery opposite

•What makes a particular photograph a portrait?

A portrait requires the photographer to capture a personality or characteristic of a person or a particular type of person usually tells from the lighting and shadow. Therefore, if the photograph fits the requirement, it counts as portraiture.

In this picture, a young refugee has been shown. The blanket wrapping her shows the poor condition and cold weather. Her eyes are not focusing and her mouth is going down, which suggests she’s suffering from war and needs support.

•Are Selfies Portraits?

I believe no. Even though selfies and portraits all identically demonstrate a person’s characteristics from facial expressions, however, their ways of expressing are different.  Selfies do not only display a picture of yourself, but it also includes your own story. The story is directly shown to the audience and they see mostly what you wanted to express. Whereas for portraits, photographers usually make use of lighting and shadows to tell the story behind the lens. Therefore, its always open to interpretations.

The picture above demonstrates a selfie of a man. By looking at the picture, we can tell that he’s outside enjoying the rainy weather, and there isn’t a specific use of lighting or shadow.


This portrait also demonstrates a woman outside, however, we can see a clear difference between this portrait and the previous selfie. For this one, there is more facial expression shown other than just happy and sad, the use of light also allows the audience to interpret the stories behind the lens.

•What should or shouldn’t be included within a portrait?

Within:

In my opinion, I think the eyes are really important toportraiture. Because eyes basically tell a lot of story behind the lens.

Also, techniques such as lighting and shadow should be included in order to make a better effect.

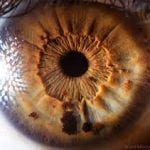
for instance, in this photo, even though the photographer only included the model’s eyes, audiences can still interpret a lot through the picture. This is due to the use of lighting and facial expression, the light only covers half of the face which darkens the other half.

Without:
Irrelevant objects, because this might mislead the audience to a completely different interpretation.

lack of techniques, because the use of the camera is really important when it comes to portraits.

•What makes a “good portrait?”

Good techniques use.

this portrait made use of really good lighting which makes the character looks more mysterious. Without the techniques, it is basically impossible for the photographer to convey his idea through an image. Because if a photograph is blank without any skills being used, it will look boring and flat.


Good model.

a good model will also contribute to a good portrait. The picture above shows a child refugee that suffers from the war, by looking at her facial expression, we can interpret a lot of stories. Her lips are going downwards, which indicates how shes about to cry,  which further triggers the audience’s empathy feeling.


•Can a portrait consist of a small detail only, such as a close-up of a hand?

I believe yes since close-up is a technique used in portraiture, and also a single object can tell a lot of stories.

The picture above shows a close-up on hand. Even though it only consists of small detail, we can still interpret that it’s a portrait of an old man/woman. And from the wrinkle, we can tell that the person has been continuously working hard, probably a job that uses hand.

•When does a more abstracted representation cease to become a portrait – for example a blurred figure, or a photograph of a person that has been torn, ripped or faded?

abstract photography usually allows the audience to interpret based on what they’ve seen, but there are no specific boundaries of which one is the true story or which one is not. Whereas portraits are meant to be photography that represents a story of the photographer or the model, therefore, there is a vague margin of what the story is or not. If an abstracted representation tells a story of the model or photographer, it should be counted as a portrait.

•Is it possible to represent a person photographically without them being present in the image – for example, through a Still-life, an arrangement of inanimate of objects? And if so, can this continue to be called a portrait?

I believe yes, because even if the actual person is not in the camera, inanimated objects that are related to the person can still tell a story of him/her.

for instance, in the picture above, there arent any person included. However, we are still able to tell that the person is around 20-30 years old since he’s working, and his highly possible a woman since there is brushe and necklace inside the photo.

•Does a portrait have to be a single photograph? How about a sequence of images?

yes, as long as a sequence of images tells about the same story, I believe that it is possible to be count as portrait.


focus:

For my following vision, I decided to focus on two social issues that are highly related to me: the covid pandemic and the pressure on students. For the pandemic, I am planning to combine two photos together in order to make a contrast effect of people with masks on and without. The facial expressions are also really crucial for this vision. Following the pressure on students, I mainly wanted to present how students are overwhelmed by the homework and exams that they were forced to take. I wanted to present this by adding transparent boxes to represent the invisible pressure and the facial expression of the model.


inspiration: photographer Ino Zeljak

(i don’t know how to do the link, so I just exported it as an image)

Following my vision, I have found numerous photos that fit my vision including this photographer Ino Zeljak. His photograph shows a contrast of 2 people by combining them together using photoshop. In his collection, he combined family photos together. His work showed how the two-person looks almost identical, but the older family member looks more mature and tired. This has inspired me to show the contrast between an identical person using techniques such as split face, which requires some photoshop skills.

https://padlet.com/candywei1/iv9pfvyx5801cg59


The title of this project is “unlimited work within limited time”. The societal issue I want to explore with my photograph is how current students are overwhelmed with the work from online learning, since they don’t get enough free time outside, but stare at their computers and do endless work for an entire day. Through my photography, I want my audience to feel the pressure on students and how e-learning is not just truly affecting their efficiency and grade but also their physical and mental health. I will get inspiration and develop my ideas by looking for photographs that show the contrast between an identical person from before e-learning and after, this could be achieved through the use of split faces, close-up and facial expressions.


My photographer for this vision is named Ino Zeljak, who is a freelance photographer that takes portraits of people.  In his photography, he takes pictures of two family members that are closely related and combine half of their face together. At the first view of his masterpieces, audiences won’t realize how the picture is made up of two faces. However, as the audience is closely observing the picture, they will gradually notice the weirdness of the photo, how their left face does not fully fit their right face, but somehow maintains a special balance.  Ino Zeljak uses this technique named split-face to show the similarities and differences between family members/ closely related siblings. By erasing the margin of two photos, Ino Zeljak has not only emphasized their dissimilarities but also created a notable balance between the two resemblance but not fully suitable faces.

By looking at his images together, I realized how he used the technique “split face” as shown in pictures 3 and 4. Ino Zeljak also does not like to include any facial expression, as in all the pictures presented above, none of the models has shown any significant facial expression but just a normal face.  Furthermore, the majority of his photographs are presented in cold color, the only warm colour that has been shown in the pictures above is the necklace in picture2. When the model’s face is included in the picture, Ino Zeljak favour putting the face in the middle of the camera, where it can easily grab the audience’s attention.

The reason why I chose Ino Zeljak as my vision’s photographer is that he has truly demonstrated a good way to contrast people under each circumstance. These pictures inspired me since as it has shown a clear contrast between people, it has also simultaneously showed the similarities. This is what I wanted to achieve in my vision- to show has the same person has changed a lot under the circumstance of an online study that is caused by the covid pandemic. As I’m processing my photographs, I will like to use the split-face technique. This technique helps me to show the disparity between a person in a different situation. I will also need to develop my photoshop skills in order to achieve the goal of combining two photos together.

In the 4 pictures shown above, Ino Zeljak concurrently made use of split face by combining two different people’sfaces together to make a new one. All the 2 models in the pictures are closely related siblings or the same family members. The angle of the model staring into the cameras are all identical, and the distance between them with the camera is also the same. The majority of Ino Zeljak’s photos are composed of cold colours, except the natural hair colour and the lips.

The subject is to demonstrate the similarities and differences between the two closely related family members. This photography is a woman wearing a blouse. Her hair isn’t fit and the buttons aren’t tied fully. The background is gray in order to show a contrast. Her facial features don’t look symmetrical, which makes the face expression look weird. This photography is taken in the modern days for example used for a resume for work because of the lighting, the position, and the clean background.  The color of the background is mono and usually people use mono background for serious events i.e. wedding picture, resume, yearbook and etc. The gray color has a contrast between the person and the white blouse. The background doesn’t repeat any color so nothing gets blend in. The character in the photo has been edited using a technique called split face. The effect and purpose is to show the similarities and differences between the two closely related family members. I like the pose because the pose of the character is very normal so its very calm to look at. The closely related family members look very alike, I almost couldn’t recognize that there were two faces. The photograph fits within culture because the style is very modern and common. It fits politically too because we take these kind of pictures all the time, for many important events: for example passport pictures that the government requested us to take. It fits socially indeed because this is a picture of two family members edited together and that definitely includes socializing. In summary, I enjoy looking at this photograph because its very calming to look at and it demonstrates the similarities and differences between the two closely related family member’s human features. My eyes are drawn to the face of the subject. The face looks weird but once you noticed that its two faces, you can feel that the people look very similar. Once you notice that the face is split, you can somehow imagine a line between half of the person. I don’t think there’s any pattern but for example the blouse is symmetrical. The light is distributed very evenly on the subject. The lighting draws my attention to how it makes the picture look bright, clean, and simple by just glowing light from the front. I think the whole photograph is in focus because all the features are very clear, especially the face. If I look away and look at the photo again, the woman’s face caught my eye because the first sight looks like a normal face but then you realize that the face features aren’t symmetrical, this presents the effect/peculiarity of split face technique. If I had to use an adjective to describe the style of the photograph it would be ‘composite’ because there are features/elements that are put together and that’s the most profound thing for me in this photograph. This picture makes me feel very serious because of the contrast of the colors in the background, the way the woman is posed, the emotion, and the lighting. I think the photograph wants us to feel serious and at the same time to see the relationship of the similarities and differences between the two closely related family members.


The subject is to show off the necklace using light, shape, and colors. I can see three different colors of background to show a contrast between the subject. I can see a necklace that is placed at the middle of the photograph because it is the most important object. I can see incomplete human features in order to present the necklace better. The setting is taken in modern days because it is very fashion and stylish, and the technique and crops they use is also contemporary. It is highly possible that the photo is taken for a jewelry shop, advertisement, or fashion magazine covers. The background has three colors, two that are similar greens and black. The black is to show a contrast, so the photo doesn’t look too bright. The main subject isn’t the person, but the necklace. But there are still human features to make the picture look more eye-catching. They covered 2/3 of the human face so the viewers can focus on the necklace. I personally don’t really like it because it makes the photograph look messy. There’s too many elements at the same time and the background could have less colors. I don’t like the posing because the background color covered so many parts of the human features and therefore you cant even see how the effect of the necklace is when someone wears it. I don’t think the photo fits culturally because the necklace looks very cultural but then the background and other elements look really contemporary and different, so I don’t think it fits. I think the photographer’s POV is to elucidate the necklace as clear as possible with other elements inside the picture too. My eyes are drawn to the human features in this picture, not the necklace, therefore I think the image failed to present the purpose to us. The lines in the picture are from layers of background colors to add texture and contrast to the image. The light is hit until the person’s upper lip and then the shadow covered the rest of the face. I think they did it in order to highlight the necklace more, so people don’t get dragged to the face. But for me, my eyes get drawn to the face more than the necklace. The necklace is in focus and some parts of the human features are too. If I look away and then look at the photo again, the necklace will catch my eyes first because that’s the purpose of the photograph. If I would describe the style of the photo using an adjective it would be ‘modern’, because the way they took the photo, the lighting and shadings, and all the different elements that are added makes the photo eye-catching but at the same time messy. This picture makes me feel like I don’t know where to put my eyes on because all the elements are added and some of it is too much so it makes the picture look messed up. I think the intended effects of the photographer’s choice is to present cultural elements using juxtaposition of the modern style. I want the photograph to make it feel that there are too many elements in it and viewers don’t get the message of it. The artistic choices I made to enable this is because there are too many elements put together and some just don’t fit or has too much of it. I think through my analysis and own thoughts I did achieve it, but everyone has different tastes.


These images are taken in a limited amount of resources being provided due to the covid pedantic and the government restriction. Under this circumstance, I’ve tried to invite different people to take pictures of them being happy and being affected by the covid pedantic. In order to create the contrast between people, i followed Zeljak’s idea of taking simple pictures instead of including a lot of props.  In order to achieve that, i used the close up technique and mainly focused on the model’s face.

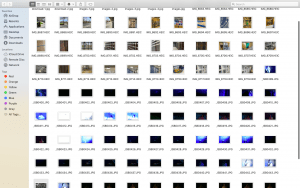
These are the blue photos that I’ve chosen for this vision, they have mainly fit my general thought about the idea and they are worth to be photoshop and discovering more. The reason why I chose these photos is that they are generally simple with just a plain face. This makes photoshop easier and is more open to interpretation. In all the pictures presented above, I’ve made use of the technique of close-up. This allows the whole image to be focused on the model’s face, and the way I set my camera as 2.8 creates a blurry background and allows the model’s face to be emphasized.


  1. For this image, I made use of lighting and focus. The main focus is on the model’s face, and the light and shadow bisect the model’s face, leaving one part dark and the other part light. This fits perfectly with my vision since the image has created a contrast between the two separate parts of the face.
  2. For this picture, i made use of lighting and close-up. The light covered most of her face leaving just the eyes and the mouth. This covers her facial expression and are good for my further photoshopping part. In addition, i will photoshop this image by adding a covid bacteria on the left side of her face in order to create the padenmic atmosphere.
  3. For this photograph, i made use of close-up and a flower as a prop to cover one of the model’s eye. In my further edition, I will photoshop the flower to a covid bacteria, as well as using lines to separate the model’s face from the middle, in order to create the contrast between before pedamic and after.
  4. In this picture, i have included a prop- mask, and some facial expression from the model. In this picture, i want to show a student being overwhelmed by the covid issue and online learning. The covid issue was shown by the mask, and the facial expression was frustrated and tired, which further indicates about the online learning.
  5. This image was meant to show a student’s stress under the circumstance of the online issue through the facial expression of the model and the colour used. The colour use in this picture was generally dark and depress, this indicates the desperate feeling of students. The model has take off her mask and showed her facial expression, which is frustrated and tire.
  6. In this image, i made use of lighting. I used projection to project a bacteria on the half of the model’s face, as well as the mask, indicates about the covid pademic. On the background, i changed the projection to some math homework, showing how these are the things that let students be overwhelmed.
  7. In this picture, i made use of lighting and facial expression. The light in this picture is really dim, which made the whole image to be depressing and gloomy. Then, the way that the model stares at the camera expressed her frustration and desperate.
  8. This image was originally just a blank face without any facial expression. Then, i chose to photoshop and edit the picture by adding a bacteria emoji and a mask. This further made the picture looks more related to my vision since it is closely relevant to the covid issue.
  9. This picture shows a student with a flower as prop. In further edition, i will change the flower to a bacteria in order to represent the pedamic.
  10. This picture demonstrated a student with a mask on and some facial expression of tireness and frustration. The reason is shown by the mask, as i mentioned above, it is the covid pedamic.

The reason why i chose this picture as one of my red photo is that this picture is highly related to my vision. My vision’s topic is “unlimited homework within limited time”, which further indicates about the current covid pedemic situation and because of that, students are not allow to go to school but stay in home and have online lesson, which is stressful and depressing. This image achieved my purpose of the vision by representing the covid issue using the bacteria and the mask that the model is wearing. Furthermore, the background of this photograph is a bunch of homework that I’ve received during the online lesson, which implies about the unlimited work that the student have to do during the online lesson. The idea behind this image is to use projection and facial expression to demonstrate the tireness and work. Therefore, achieve my vision by using these props. The story behind this picture is that even though the student is really tired already, but she cant rest because she there are a lot of work that she haven’t finish. Also, the bacteria covering her eyes demonstrate that she cant see the view outside due to the covid restriction. The overall strength of this picture is that it has fully illustrated what i am wishing to show in my vision. During the time of developing, i developed my focus stills and improved my use of technique. Before, i didn’t know how to focus using a camera, but for this image, i went to search up online and discovered how to do so. Also, i used zoom-in in the camera to achieve the technique close-up, this is also something i haven’t learnt/done before. During my process, i have learnt how to use my camera correctly. Before, i always thought that the light on the camera cant be alter. But after taking this image, i discover that by increasing my ISO, i can make the picture more brighter. Also i realized that the bigger the number of Aperture values is, the bigger the focus will be.  If I changed my Aperture value to 2.8 (the smallest value that my camera can reach) The focus will only be on the person. Something that have work well in this image is the projection, at first, i thought i cant not achieve this image because there arent any studio for me to take pictures. But then i realize that i can use the projection in my house, which works perfectly well and helped me to achieve this image. Something i need to develop further is make the picture’s topic more clearer. This is because since portraiture is not entirely open to interpretation but sort of following the idea of photographer, I should make my topic more clear in order for my audience to follow my step. For my next set of photo, i am going to keep the same social issue and photographer, however change the way of taking photos. Next time, i might utilize some shutter speed to make my photo more blurry, and add more photoshop. This helps my photo in general but clearer my topic to the audience.


This is an image that conveys the story of a student who wants to go play outdoors, but she can not fulfill her desire due to the pandemic that is occurring in the world, resulting in her not being able to witness the natural environments on earth with her beautiful eyes. This is an example that supports my vision that students under the circumstance of covid pandemic and online lessons are overwhelmed by unlimited work and tiredness, and cannot achieve their dream and desires.

The girl’s facial emotion fits in with the virus carton figure and contrasts well because the girl is slightly smiling yet miserable about the circumstance of our world right now, contrasting with the facial expression of the cartoon figure which is smiling in a sort of evil way, since it is the villain of this whole circumstance. The cartoon figure also helps the picture stand out because it is not common to have a cartoon character in a still-life picture, and it also acts as an alert to the viewers and transfers the message of the virus more effectively.

In photoshop I increases the contrast a little bit so that the detail in the hair and the face was more defined. I didn’t want to increase it too much because I like the normal colors that were there again the background color green, which also makes a connection with the green on the virus figure. I also used the eraser on the skin because I wanted to make the texture of the face similar to the cartoon figure, thus I made it smoother so it can make the eyes of the face stand out more from the rest of the face.

This picture is my favorite out of all the pictures in this project because I love how it is an unusual insertion of a cartoon figure onto a clear photo taken on a camera. Therefore, that challenged my photoshopping skills since I had to trace and cut out the cartoon figure and paste it onto my original photograph. The girl also has her hands up against her face, hinting at to fight against the virus and not much expressive emotion on her face which makes the picture look quiet and undisturbed


7


This is a photograph taken of a student who just got out of class, and she is feeling tired and exhausted, the mask on her face represents the epidemic, which can be interpreted that she is taking online classes due to the epidemic. The message behind this image is trying to express the emotion many students feel after taking online classes, which is usually fatigued and overtired, it can be because of many reasons, whether it is how the heavy amount of homework they receive, or the screen time they look at each day, and so on.

When editing this image I wanted to focus on the composition of light and how it creates an underexposed feeling to the image, which works to create an interesting view for the audience due to the vision I wanted to express, which is how the pandemic is a dark and tiring period. I used my editing software on my phone by first enhancing the contrast and the clarity of the image, this meant that the mask part displayed in the middle of the image stands out in a bold way. Next, I cropped some parts of the image so that the picture plane was more focused on the areas on the student’s face with the darker light. Lastly, I converted the image to a nearly black and white filter so that the viewer would acknowledge that the message I want to send is related to negative emotion.

I am extremely pleased with the outcome of the image because of the texture of the mask and the student’s face standing out in the image. I really like how I cropped the downer part of the student’s body so that her face and mask frame the picture. I also like the lighting and the dark tone I have created which creates a bigger definition of how the coronavirus turned students to be tired and stressed out.

Something I need to develop further is making the emotions seem stronger on the student’s face. Reflecting on the process of taking this picture, I didn’t quite inform the correct and clear information to my model, which resulted in her emotions to be not expressed fully, next time when I have to work with a partner to take the picture, I would try and make myself more clear about the message I want to express. In this place, is adding a bit of anger and stressed emotions onto the face to stimulate the eye of the audience more.

6

The subject of the photograph is how students are under the stress of the online learning work caused by the covid pandemic. In this photograph, I see a person wearing a mask, a reflection of a germ/disease covering 1/3 of the persons face, white background covered with paper homework. All the elements of the frame support the subject because the reflection of the germ on the face and the mask the person is wearing all represents the pandemic. The background covered with homework represents the stress and amount of work online students have to do. The person’s facial expression also doesn’t look happy, she looks tired, this represents stress of online work. Therefore, all of these aspects fit to the subject. My eyes are first immediately drawn to the reflection of the germ on the person. I want the eyes to first get drawn on the face with the mask and then germ, at last I want them to get drawn to the background with all of the homework. I think the exposure is correct, it focuses on the person in order to let the viewers get drawn at the mask and germ first because covid is the main reason all of the stress and homework is caused by. Therefore it should be notices first. Then when you look closer you can see the homework papers at the back, which then reveals the stress and amount of homework covid has brought to students due to online learning. The background that is covered with paper homework isn’t just to add texture to the photograph, it is to symbolize online work, which connects to the subject. The composition is made up from 3 parts, the mask, germ and the background. I think the amount is perfect because even though the mask could represent covid already, adding the reflection of the germ adds texture to the photograph and is more eye-catching, therefore it also makes the photograph balanced. I think it shows my vision clearly, each component that is included in my subject is represented in the picture. Each element symbolizes a part of the subject. I asked one of my friends and they guessed that it is doing online work during the pandemic. They didn’t really get the part of the stress and I think its because the emotion of the person isn’t clear enough. One of my friend said that the emotions on the person’s face gives a tired and depressed feeling that is caused of overwork during online class. Therefore I addressed my vision and message successfully using this photograph.


10

The subject of the photograph is how students are under the stress of the online learning work caused by the covid pandemic. In this photograph, I see a person wearing a mask and a plain white background. Not all the elements support the subject because it only shows that the time period is during the pandemic. It doesn’t show anything regarding stress caused by online learning. My eyes are immediately drawn to the person’s face, and then the mask. I want the eyes to be drawn at the mask first because it represents the pandemic which is one of the elements of the subject. Once you know what the subject is, you get distracted and realize that the photograph is incomplete because it only shows the pandemic part with the mask and nothing about online class or stressful emotions. The exposure is correct, the lighting is all even around the photograph and because the background is plain, it highlights the person and conveys the subject more, even though some elements are missing. The background is doing nothing, it doesn’t show or represent anything, its just plain white and doesn’t add any texture or meaning to the photograph. Therefore the photograph above is more successful. The photograph doesn’t look balanced because elements are missing. The color isn’t accurate too because there’s too much white and makes the photograph look boring. This photograph doesn’t show my vision fully and clearly because many components are missing, for example the online works, and therefore it doesn’t convey my subject fully. My audience identified the main element of the photograph that is the mask which they noticed symbolizes the pandemic, but they didn’t know the complete meaning this photograph wants to convey. Due to the mask, they recognized that is it during the pandemic period and the emotions are tired and unhappy.


These pictures are token during the covid restriction, therefore, we often are not allowed to take off our mask due to the government rules. However, this has perfectly fix my topic since it is about the pedemic issue. Instead of the contrast between one picture in my set one, i decided to keep the same social issue and change the way of taking photos – by connecting two full image together with one before covid and one after covid. Furthermore, i decided to name my set “Changes after time” indicating the mask that doesnt exist before covid and on after covid. In all the pictures above, i let my model stand in the same place with mask on and off, showing the differences.

The picture shown above are my blue photos, they have fix my social issue generally well and have reached my expectation of the plan shot. In further edition, i will try to use my photoshop skills to put the two contrast picture together to create a differences between before covid and after, this can help my audience to achieve further interpretation.

  1. This picture used focus on the model to let the audience keep their attention on the model. This picture was to show the model after the covid pedamic and the audience can realize this by looking at the mask that she is wearing. This picture will be photoshop together with the second image to create a contrast feeling.
  2. This picture used lighting to emphasize the happiness shown in the model’s face by presenting her smile. It is to demonstrate the student after covid pedamic. Furthermore, this picture will be photoshop together with the first image to create the contrast scene.
  3. This image is meant to show the student after suffering from covid and finally reached the outside world. The audience can discover this by the mask that the model is wearing. Moreover, this picture will be photoshopped together with the fourth image in order to reach my plan shot.
  4. This picture used lighting and facial expression to show how the student is enjoying the nature, and this does not seems like a unusual thing since the covid pedamic has not reached yet. She is not wearing mask, and this picture will be edit together with the third image to reach my expectation.
  5. This image used facial expression to illustrate the student’s sufferness and how she can finally come out of the quarantine. This will be edited together with picture six to create the contrast image.
  6. This image utilized focus to emphasize the existence of the model and to blurry the background nature. This indicates that the outside world is usual for her and she enjoys it without the rules of wearing a mask. This image will be contrasted with picture 5 to reach my plan shot.
  7. This image the model utilized facial expression to express the happiness of the model enjoying the outside world. There are no restriction for her, and this can be discovered by her blank face without wearing a mask. This picture will be connected with picture eight to create the contrast image.
  8. In this picture, the prop mask contributed the majority of the topic. The model’s facial expression has been covered by the mask, which implies about how she can not be happy even though being in the nature. This picture will be photoshopped together with the seventh image to reach my standard.
  9. The model is smiling in the picture, which implies about her happiness of not wearing a mask outside. The light on her face has totally showed the brightness and will be contrasted with picture 9’s darkness.
  10. In this picture, the model has her head down, which is implying about how she is in a sad mood. This is going to be photoshopped with picture 9 to achieve my vision’s purpose.

This picture meets my vision since it creates a contrast between before covid and after covid by utilizing photoshop skills and combining two pictures together. The idea of this image was to show how students changes due to the covid pedamic, this can be obviously discover by looking at their mask and facial expression. This photograph tells a story keeping basically the same pose and staying in the same position, however, the only difference is the mask that appears on the model’s face. This allows the audience to realize the difference right away. The strength of this image is that as i mentioned above, the model’s position haven’t change much, this helps the audience to interpret the topic right away instead of misleading them. While taking this picture, i have developed the skills of trying to keep my camera not moving too much, this helps me to take this almost fully identical two picture. Something i need to improve on is how to keep control of my ISO, during my process of taking the photos, I took a lot of useless photos because of either too bright or too dark. For my next set of image, i will try to set my ISO as Auto, which will decrease the time of me trying tofind the suitable light.

This image was to show the changes of students after the covid issue, it can be discover by the model’s movement and her facial expression. This picture tells a story by the adding props, slightly different facial expression, and the almost identical background. Which allows the audience to think of what happened to the model that she is wearing a mask despite being in the same place and wearing the same clothes. The strength of this picture was that the lighting was suitable for the picture, due to the previous failure, i have gained experience and didn’t waste my time on changing the ISO. While talking the picture, i have developed skills of choosing the suitable ISO. Something I need to improve on for my next set is to keep the camera in the same place, in order to let the audience understand more clearly that the model is standing in a identical place, and to not mislead my audience.


This image was to present how student has changed a lot due to the covid pedamic, which can be discover by the model’s clear facial expression and her movement. This picture tells a story by keeping the identical background, lighting and clothes, but only add a extra prop- mask. As i mentioned above, this allows the audience to clearly understand what has been added from picture one to picture two, which can not let them interpret in the wrong direction but follow the right track. The strength of this picture is that the almost nothing changed except of the movement, added props and the facial expression. While taking the picture, i have learned from previous experience and did well on keeping my camera stable and finding a suitable ISO. Something i need to improve on might be let the model stand more closely into the light in order for the facial expression to be more clearly observed.

favourite photo:

The reason why this is my favourite photo is because it has expressed my vision bestly. There are no distracting elements, and when the audience look at the photo, their eyes will be firstly and immediately drawn by the model and the added props- the mask. The exposure is mostly correct and reached my expectation since the light is mainly on the model’s face which drags the audience’s attention immediately. Personally, i don’t think changing the focal length will improve the quality of the picture since the focal length right now suits the picture the most. The background contributed a lot since by keeping them fully identical, the audience’s attention will be dragged to the mask.  The model and the tree has occupied the middle part of the picture, so it reaches a balance. The colour is accurate since the atmosphere i want to create is the nature. Lastly, since the model is a student, audiences will evoke sad feeling since they are young.

least photo:

The reason why this is my least photo is that it has a lot of distracting elements. For instance, while looking at this picture, it is most likely that the audience’s eyes will be drawn to the building behind the model instead of her. The focal length is mostly correct, but it will be better if it is more focused on the model. The exposure is mostly correct, but it will be better if the light is more on the model instead of the building. Furthermore, the background is distracting the audience from keeping their attention on the model, this is why it is my least favourite photo. The colour is mostly accurate, but since i want to present nature, the building is a bit of unnecessary.

set 1 blue and green photos

These are all of my blue photos, i took them in around 20 places. Therefore, they are very different than each other and allowed me to have various of selection. My main subject of these photos are mostly nature, small objects and human. These subject are also closely related to my vision – the beauty of the ordinary since i have not added any filter or photo editing. This is also the reason why i’e choice these photos. During the process of taking photos, i developed my photo taking skills and photo editing skills.  They also allowed me to have various selection when it comes to green photos. The value of these pictures are also different, this is because i decided to not keep my photographer’s black and white style into my own work. During the process of taking photos, i developed my photo taking skills and photo editing skills.


my blue photos are as follow:

Candy-Photograph (1)

photography set 3

Aaron Siskind

whats beautiful of a subjects texture.

For this set i decided to make some changes from the previous ones. Instead of the beauty, i will be focusing on the texture of subjects more. Most of the time, people will not pay much attention to the texture of the subject around them,  but paying more attention to the value and shape etc.  However, by looking at my photography, I want my audience to feel the importance of the texture and realize the beauty of it. By the process of taking these photo, i will develop my photoshopping skills and photography skills.  By achieving these goal, i will focus on taking pictures of a specific type of texture of a single subject.  Therefore, unlike the photos that includes fancy value or shape, i will make my photo conclude less value by showing only 2-3 colours. By doing this, it allows my audience to focus more on the texture of the subject instead of other characteristics. This was design for the audience to realize that texture also has a beauty inside even though there arent any decorating colours added. I will get inspiration and develop my ideas by looking for photographs that shows a specific texture of a single subject. It will be better if there arent any fancy colour but just some simple uses.


black and white – all of these photos are took in a black and white value.

texture – all the photos above shows a similar texture of subjects

all the texture are not shaped as a real thing but randomly and cant tell what it is

all the pictures included a lots of abstraction techniques.

all the photos included lines, value and shape.

In picture 1 and picture 4, they all showed some broken pieces of walls. These broken pieces are shaped randomly, there is not a specific subject that can represent these shape but let the audience interpret themself.

In picture 5, it shows a ground where there are some stairs. These stairs are all in straight line and are all positioned equally. However in picture7, which shows some broken part of a wall, I discovered that there are also some lines presented.  However these lines are curved, and they are not equally spread but randomly positioned.


7

•Why did you choose this image in particular?

The reason why i chose this image in particular is because this image has included plentiful of elements, and it is every unique. This picture show above shows some pattern on a wall, and this pattern is most likely due to the old skin of the wall falling off. This phenomenon has created a special effect on the picture because the pattern shown is really interesting and shows the use of shape in abstraction.

•What do you find surprising or unusual about this photograph?

The things i found surprising or unusual about this photograph is how did this picture originated. As i mentioned above, the shape in the picture is highly possible due to the falling of old skin on the wall. This has created a special effect since the contrast between the wall and the shape is really strong. On the back, there are some curve lines shown. These lines are repeated, but as it gets lower the lines started to get blurry. The wall is also in a dark colour/ value, which makes a big contrast to the light value in front, which is the shape. Also, the shape is randomly positioned and there is no pattern or repetition shown, therefore it created a contrast to the wall behind it since it contain repetition and was deliberately positioned.

•Look carefully and choose ONE of the Formal Elements that you think is important in the photograph (E.g. Focus, Light, Line, Repetition, Shape, Texture, Value/Tone).

shape

•Describe why you think it is important (2 or 3 sentences)

I think the use of shape is important in this photography is because this picture is mainly build up of shapes. For instance, you can see that in front, there is a shape where it is randomly position and no pattern or deliberate message is being sent. However, the shape behind ( on the wall) is mostly following a pattern separated by lines, which created a big contrast between the random positioned and the one that are repeated.

•In what ways are your chosen artist’s photographs abstract?

My chosen artist’s photographs are abstract because he used a lot of element inside his work. For instance, in picture 7, he used shape as its main subject. However, this shape has not deliberately sent a specific message but allows the audience to interpret it themself. Furthermore, in picture 5, there is also the use of repetition. The blocks were separated identically and the gaps between them are also equal, as they are being repeated, the use of repetition is shown. In picture 1, there is also a present of value. On the back, the colour/ value is mostly dark colour. However, in front, the use of colour is mainly light colour. The use of colour created a big contrast between the two shape and allows the audience to interpret more using their own thought.

•What do you like about the style? Be specific and explain your answer.

I really like how most of his photographs focuses on those falling pieces on a wall. This is because this has perfectly related to my vision. In my vision, i pointed out that my main purpose was to let my audience feel the beauty within a texture, and the shape on the wall has expressed my feeling. Walls are not always being noticed by people around them, however, by presenting these photos, Aaron Siskind allowed his audience to pay attentions to the texture of the walls.

•How will you adapt this style to your own photography? How does the image/artist inspire YOU?

I will adapt this style to my own photography by focusing on the same topic but using different subjects. In Aaron Siskind’s work, he mostly payed his attention to the wall and took pictures of the shapes on the wall. However, for my photography, i will keep the same concept but change the different subject. Instead of focusing on walls, i will mostly focus on things that are around us but always not being noticed. For instance, curtain, floor etc. The image inspired me by letting me realize to pay more attention to the texture around us instead of focusing on more fancy looking subjects.

These photos are all various to each other. By the process of taking these photos, I have developed my photo editing skills and my photo taking skills. I’ve went to various places to take these photos and i’ve spend a lot of time. However, due to the pandemic that is currently going on, most of my pictures were token in the campus. These pictures were inspired by Aaron Siskind, his work were mainly focuses on the texture around a single subject. By taking the photos above, ive tried my best to use the similar technique.


  1. This photograph u sos textures and light to represent the subject. The yellowish light hits from the loft of the imago and therefore highlights the right features of the image. The whole picture creates a texture of fluffy and mossy feeling, this
    texture is created by the shadows as mentioned before, because these shadows can high light the shapes that stuck out.
  2. This photograph uses lines and shapes to represent the subject. The whole picture contains many thin straight lines in the middle of the grip, and on the edges, there are thick curved lines that seem looser compared to the straight lines that are sometimes crossed other by each other. The shapes used in this image are circled based, on both the right and left sides of the image. The background color is a brownish-yellow that emphasizes the color of the lines more, which is a brown that is darker.
  3. This photograph uses lines, colors, and textures to represent the beauty of the subject. This image contains short thin and small lines that are in the color gray and black, it then contrasts with the background color of white. This is because the white color takes the majority of attention in this image, so adding little short dark lines adds the spice to this image and also creates a texture of the surface being rough.
  4. The subject is a fabric the color black and white. I contains a variety of black shapes within the white fabric, these shapes are sometimes normal but sometimes curved, to create the texture of the fabric The texture is also portrayed through the light and values of this image, specifically the black shadows on the fabric, spreading from the middle to the edges, from this the audience can infer that this image was taken on a flat surface. The background of this image is half in black and the other half in gray, this can also be taken as a hint to the audience that this fabric is laying on a flat surface since there is a gray surface
    underneath it.
  5. Within this photograph, it utilizes shadows to establish a concave and convex texture. It also uses the color dark gray and light gray to better portray the texture of the subject which is the curtains The image is taken at a straight angle from a person’s point of view, and there is a ray of light shooting from the right of this image, which creates a contrast between the dark shadow on the left. This image also includes the same patterns of straight lines, and the highlights beside each straight line make it form a texture.
  6. This photograph reveals the diversity of shapes and space, by adding a variety of shapes within the image. In this photograph, the shapes are sometimes spread out but sometimes closed together, especially in the top left corner the shapes are closed together. This creates a sense of messy, yet not messy organization of the different shapes. The shapes are in different formats, but in general, the shapes are triangular shape.
  7. This photograph uses shapes and colors and also lines to form the image. The shapes used are not normal shapes, it splits in the middle and forms a straight thick line and there is also a shadow that creates a shape on the top right corner of the image. There are also lines that cross over the shapes which forms an interesting feeling for the audience. The colors used are gray and dark gray blending throughout the shape that creates another contrast with the background color white.


5

This image is inspired by the work of Aaron Siskind. He has been called an abstract photographer and, indeed, many of his photographs feature subjects that are not easily identifiable at the first sight. His photographies also include many patterns, which is where I took the most inspiration from. In his masterpiece, he uses black and white for his photographs to present and highlight the subject more and not let the viewers focus on the details. But I chose to leave the colors just the way they are, because my topic is “whats beautiful of a subject’s texture”, and I think if you want to highlight texture, then the subject itself is very important, and the natural colors it has also represents the beauty of the subject. In this picture, I specifically want to portray the natural patterns and texture of a subject because mostly if you include patterns, viewers will like to watch it because your brain likes to look at patterns. In this picture, the straight lines of the curtain makes the whole image more eye catching because all the lines form the pattern. I also chose the curtains as the subject because it appears in your daily life, but often it gets ignored and through this picture, I can portray the satisfaction of the pictures elements.

7

I was motivated by Aaron Siskind to take this picture.  This photo is linked to the his work since i’ve also included similar techniques but various subject. In this picture, i’ve emphasized shape, value and texture to achieve the goal of imitating his work. In his photograph, he used the shape that’s been caused by the falling pieces from wall as its main subject. Whereas in my work, i used the shade and original paint as my subject. The texture of this picture is also similar to his, in his work, the texture are all rough, in my work, it is mostly tiny not smooth area that are usually found in the walls. The use of value has also contributed to the picture, in front, the colour of the shape is coloured in dark colours, whereas in the back, the colour are mostly light colours. This is a reference to Aaron Siskind’s work, whereas in his work, he did it reversely. His dark colours were at the back and the light colours were in front.

4


This picture was motivated by the work of Aaron Siskind. In his masterpieces, he highlighted the colour use of black and white, whereas in my photography, i decided to not follow the same but add the colour red. His pictures are usually structured as a subject in front of a wall, therefore, i planned to imitate his idea and i took a picture of this fabric cloth positioned in front of this sofa. In his photo, the use of values are usually dark colour in front of light colours and allow them to create a contrast. However, in my picture, i decided to keep the idea but put black and white in front of a light colour red. This has also contributed to the image by creating the same contrast as the work of Aaron Siskind. Furthermore, I’ve also kept the repetition pattern from his image. But in his image, the repetition are usually shown on the back or on its own, whereas in my image, the repetition is in front and there is just a blank red on the bakc

photography set 2

miguel ribeiro


the beauty of a human feature

Following my vision, I decided to keep the original idea but add on to it. Therefore, i am willing to show my audience the ordinary beauty of people in life. People who usually walk around us might seems too normal and we don’t often pay much attention to them. However, by looking at my photography, I want my audience to feel the prettiness of the people around them, and the beauty that they are born with. By the process of taking these photo, i will develop my photoshopping skills and photography skills.  By achieving these goal, i will focus on taking pictures on a person’s characteristic. Therefore, unlike the photos that include the whole body, i will be focusing on the one special part of a human in order to highlight the characteristic. This was design for the audience to realize that beauty still exist even though there are no filter and colourful editing. However, every part of human’s feature has its own beauty. I will get inspiration and develop my ideas by looking for photographs that shows a specific part of a human’s feature without any editing.. It will be better if there arent any decoration but a single subject’s picture.

  • zoom up – all the photos above focused on a specific characteristic of a human.  For instance, picture 3 shows a zoom up of a human’s eye, and picture 2 shows a picture of human’s tongue.
  • human- all of the pictures above has a same subject – human.
  • black and white – all the photos above shows no colour but black and white.
  • ordinary posture – all the pictures above has a ordinary posture and people will do during real life.
  • most of the pictures above shows hand, followed by faces.

Picture1 shows an image of 2 hands holding together. This photograph used black and white as its colour and it placed the hands in the middle in order to highlight the importance. This is also a ordinary posture that normal people will do during daily life. This picture also has hand as its main subject.

The reason why i chose Miguel Ribeiro as my photographer is because his work truly expressed the feeling i desire. This is also closely related to my vision since his photography highlighted and emphasized the importance and beauty of a specific human feature. My vision was to let my audience feel the ordinary beauty that human part can bring without using any filter, Miguel Ribeiro achieved my goal by taking specific part of human using only black and white.


Picture 2

2

Why did you choose this image in particular?

I chose this image because it’s very special. The tongue is a muscular organ in the mouth. The tongue is covered with moist, pink tissue called mucosa and therefore, normally when people think of the human feature “tongue”, they will think of saliva of other people, which may make them feel disgusted. But this picture not only represented the nature of the human feature, it also portrayed the human feature in an artistic way. The way the tongue and

chin connects represents how human organs work to let our human body work and function properly. I also like how the image is black and white. It allows the observers to focus on the human features and not get distracted by the contrast of colors.

•What do you find surprising or unusual about this photograph?

It’s really cool how the image is cut. How it only shows a third of the face and focuses on the motion of the tongue and chin. I also didn’t expect that if someone takes a picture of this part of the human feature, it will be in black and white, because the colors represent the nature of human features.

•Look carefully and choose ONE of the Formal Elements that you think is important in the photograph (E.g. Focus, Light, Line, Repetition, Shape, Texture, Value/Tone).

This image is in black and white and a black and white photography can be all about texture. Color is no longer a crutch or handicap that keeps you from noticing other aspects of your pictures. This black and white image draws your attention. It’s no longer the vivacious colors of the flowers but instead it may be the texture of the rose petals with dew on them. Shapes, contrasts, textures, layers, depth, and light become more prevalent factors in how you guide the viewer’s eye through this pictures. It highlights the subject that you are trying to portray, in my case it’s the human features, the shape of the tongue, mouth and chin.

•Describe why you think it is important (2 or 3 sentences)

Our human features makes us human. Even though this image only portrays a few human features but all the features are still very important for us. Without any of them, the whole system may get effected a lot. For example the tongue, this picture shows us a shape of the tongue, the tongue helps us taste delicious food we try and enjoy. Therefore I think this image definitely portrays and elucidates a strong message.

•In what ways are your chosen artist’s photographs abstract?

My chosen artist’s photographs are abstraction due to the way i

t has been presented. In his artwork, he made uses of colour, texture, focus, and value.

•What do you like about the style? Be specific and explain your answer.

I liked how he used zoom up to highlight the human feature. This can really inspire the audiences since most of the time, we focus more on fancy photography instead of these black and white photo

s. The subjects in the pictures are normal and ordinary to most or all the audiences, however, most of them probably did not pay any attention to these small beauty that are around them in real life. By taking photos like this, Miguel Ribeiro allowed the audiences to realize how the small things around them in real lif

e also has its own beauty.

•How will you adapt this style to your own photography? How does the image/artist inspire YOU?

I will adapt this stype to my own photography by using similar techniques but different subject. For instance, for my photography, i will use the same colour and texture as the techniques. However, i will no longer focus more on hand expression but more facial expression. The artist inspired me by allowing me to realize the beauty of the people around me in real life.


these are all the photos i took for set 2, I took these photos in more than 20 places and i’ve also included the imperfect once. These photos are very different to each other, i took some of them in school, some of them in the part near my house, and some of them in the studio. The reason why i chose these photos are not only because they are different, but also they allowed me to have various choice when it comes to the green photos. They are also either related to the artist we’ve learnt before, or mostly related to my artist in the vision. Therefore, i have a reference of the work they made and this helps me improved my quality of the pictures.

1.

This photograph uses value, light and texture to represent the motion/movement of what the subject is doing. The juxtaposition between the colors elucidates the brightness of the hair more. It creates a dark scene for the background in order to make the hair more eye catching from the entire photo. The color of the subject (photo from the camera) are mainly bright yellow and dark brown, and therefore the contrast between the light and dark colour elucidates the subject more.

2.

This photograph is a persons half face that is smiling. The picture is very eye catching because normally when we see a smile it gives us a feeling of brightness and happiness. But this picture has more of a darker filter which makes the photograph more interesting and gives a gloomy/high dark feeling. This photo used value, shape and light to show the beauty in the ordinary. The photograph only contains dark colours which shows the subject more clear.

3.

This photograph uses value and shape to represent the beauty of the subject, through a contrast of high dark background and a hand that is bright on the photo. The use of colours emphasizes the hand in the photograph more since the light colour creates a strong contrast to the dark black and blue. The subject used in this photograph is just a hand, but it gives a mysterious and gloomy feeling through the contrast of colours.

4.

This photograph uses shape and light to represent the beauty of the subject. The illumination of the light that hits the object creates a dark shadow and makes the object look powerful. The background is dark, but since the light illuminated the subject at the front, it creates a light effect to present the object better. The gradient from dark color to light blue from the persons face creates a gloomy feeling and it makes the face look clear.

5.

This photograph uses shape, light and texture to elucidate the subject in the image. The use of colour is very rich with a combination of blue,green and white. Even though the subject only has one color but through the colorful and bright background, highlights the subject and makes the image look more interesting. The contrast between the colors elucidates the darkness of the subject more. The lighting hits a little from the right, which doesn’t reveal the left side, therefore, it creates a mysterious feeling for the observers. The subject used in the photograph is a person, and the person is photographed in a dark color in the picture, which gets highlighted by the colorful and light background.

6.

This photograph uses value and shape to represent the beauty of the subject, through a contrast of high dark background and a light coloured human feature and watch. The use of colours emphasizes the hand and watch in the picture since the light colour creates a strong contrast to the dark black. The subject used in this photograph is a hand and a watch, and they are the only light colour object within the photograph, which highlights the object.

7.

The subject is one of the human features. Even though there isn’t really a background but through the lighting you can definitely tell that the background is dark too. Most parts of the subject are dark colored, but the bright white mask gives a contrast between the dark colours and makes the whole image more eye catching. The contrast between the dark background and light colors creates a gloomy/high dark feeling. This photo used value, shape and texture to show the beauty in the ordinary. The photograph only contains light and dark colours which shows the subjects more clearer.

8.

This photograph uses value and light to represent the subject. The red light hits from the bottom from the persons face and therefore highlights the bottom features from the face more than the top. The whole picture is more dark than bright which gives a very mysterious feeling. The use of colours creates a high dark scene because it’s mainly dark red and black. The subject doesn’t look to the camera and instead looks at somewhere else, which makes us wanna know more about the image.

9.

The subject is a half face from a person. The contrast between the half of the face makes the picture look very interesting. The right part is where the light hits, whilst the left part is where there’s no light at all. The picture might give people a feeling of contrast of a persons personality, one part is where the person expresses and shows everyday and the other dark part is something you don’t know about them. Therefore the picture is very interesting. The shadow of the hair that hits the forehead makes the image look more rich and interesting. The contrast between the lighting is perfect and the persons expression also suits the mood and makes the picture more eye catching.

red photos

1. This image is inspired by the work of Miguel Ribeiro. in his photographs, he specifically focuses on human features and portrays the human beauty through using the contrast of colors. I was inspired by the way he took the photographs, especially by the way he utilizes light and texture in black and white. Even though all of his photographs are in black and white, I still decided to leave the original colors of the nature of human features to portray their beauty. I think I’ve successfully created a work similar to Miguel Ribeiro because I have captured a human feature and I utilized light similar to him by only making it shine from one angle and not light up the whole picture. The use of shape is a human hand and it is closely related to my topic “the beauty of human features” in several ways including light, texture and etc. First of all, the hand is a very ordinary human feature that people see everyday in real life but sometimes, the beauty of human features get ignored. Secondly, I didn’t add a lot of details and techniques to this image because I want to portray the natural beauty of human features and not emphasize it using editing.

This image is inspired by the work of Miguel Ribeiro. Miguel Ribeiro has approached one of the most complex and contentious issues facing humanity: the origins and evolutionary course of life. I wanted to capture a part of the human face from an action, it best describes as thoughtful, informed, and as free of preconceptions as is possible given the beauty of the human features. Many people nowadays feel inferiority with their own looks and their human features, especially during covid-19 when everyone just has to wear masks. I used shape, tone and texture to emphasize the subject. The shape is basically the human feature and I used tone mainly for the darkness of color. It is used to create a dramatic and gloomy atmosphere. There are straight and curvy lines that reflect onto the face from the hair. I added blue colored light in order to show a contrast. The image is still simple but the light effects made it more eye-catching and inspire-able because it hits from the bottom, so it emphasizes the confidence, power and beauty of the human feature, more specifically, the face. The viewers should feel the confidence and nature of the image because everyone should accept the way they are and accept the beauty of human features.

This image is motivated by the work of Miguel Ribeiro. Miguel Ribeiro likes to capture human features through physical actions/ interactions and this photograph perfectly matches the standards. You can tell it through the blurriness of the image because usually if a photograph is blurry it means that the subject is performing an action. Even though this image is mainly just a simple ear, but most of the times, people ignore the nature and beauty of the human features. In this image, the bright silver earring also elucidates a contrast between the natural skin color and makes the whole photograph more interesting. In this image, the lines are mostly curved that go in a same direction and shows a pattern. Through this picture, even if it is very simple and ordinary, our human features are the most real things we got. Also our inner parts are very important, like our minds, it is metaphysical and we cannot really observe a mind or judge it, so we create photographs of things we observe and see the beauty from. As an artist, the human body is real- embodied real. And the human features are the roots of our mind. Also as artists, we delight in shapes, forms, and tones. What more delight can we get than the human features?

red photos

This image is inspired by the work of Edward Weston. In his masterpiece, he used only simple colours such as black and white, I was inspired by the use of colour, but I decided to use some other colours such as red and brown. I am also willing to focus on the symmetrical shape of the chair and the tone behind it. I think I’ve successfully created a similar work as Edward Weston’s photography, due to the use of shape space, and tone. The use of shape in this photo is just a chair, and it is closely related to my topic “the beauty of the ordinaries” in several ways. First of all, the chair is not a fancy subject that people will get fascinated by in real life, but something that is often getting ignored. Secondly, I’ve not used any specific technique to emphasize its characteristic but just an ordinary photo. The use of shape in this photo is also editable, you can crop out the left part and highlight the chair, it will also work if cropping out the right side and highlighting the value on the left. The use of tone in this photograph is mainly black and white, however, there is plentiful transition colour such as grey and light black.


This image is inspired by the work of Edward Weston, and the Covid-19. In his work, he used straight photography to emphasize the beauty of the subject, therefore I decided to follow his steps. I am also willing to show the beauty of the ordinaries by using the mask as the main subject. Under the current virus, many people are focusing on the virus however ignoring the importance of the mask. Thus, I used to tone, shape and lines to present my initial topic. The use of tone in this picture sort of symbolized the sky, it is also exposed to light and I used cool colours. This also highlights the chair since it has a contrast in colour. The use of shape in this photograph is just a mask, which symbolized the virus. I’ve also used vertical lines to fortify the mask.


This image is motivated by the work of Edward Weston. In his work, he used black and white colour and a subject to show the beauty of the ordinaries. I was inspired by his use of colour but I decided to add some colour and movement. Therefore, I used tone, and texture to represent the beauty of the ordinary in this work. First of all, the tone in this picture does not include a transition colour, however using the contrast of the dark background and the light subject. The background was designed to be dark, therefore I used dark blue. Which further creates a contrast to the subjects (book, hand, and the spray) in front. Secondly, the texture used in this image can be discovered from the reflection of light on the chair. By the light reflection, we can tell that the chair has a smooth surface.

Candy- Photograph

analyzing Edward weston’s photography


  1.  1.close up 2. black and white 3. texture 4. smoothness 5. light reflection
  2. .all the photos above used close up so audiences can observe the texture and the subject more closely and precisely.  In  picture 4, 5,6 and 8,  by looking at the light reflection, we can clearly tell that the photograph mainly focused on the smoothness of the surface. In page 1 and 7, the photographer specifically pointed at the leaf’s texture, and number 2 and 3 focused on an aspect of an animal (or person). In all the 8 photos, the photographer didnt add any other colour rather than black and white. The photographer also didnt use long shot at all, but mainly focused on the the characteristic of the ordinary subject.
  3.  The reason why i chose this photographer is because he’s photograph are closely related to my vision.  The purpose of my vision are to let my audiences find the beauty of the ordinaries by enlarge the subject and only use two colour. Similarly, Edward Weston’s photograph of pepper has attracted me, this is because it has truly presented what i was trying to show.
  4. the quote “The camera sees more than the eye, so why not make use of it?” by Edward Weston inspired me with the interpretation of his work by a lot. This has also further proven my idea of if people can’t pay attention on the ordinary things in real life, photographer should make use of the camera and capture it to let the audiences realize the importance.

responding to an image

  1. the reason why i’ve chose this image in particular is because this photo has presented what i was trying to show in my vision.
  2. What’s surprising or unusual about this photograph is that the photographer didn’t use much of techniques or skills to represent straight photography. He simply used black and white, and texture to let the audience found the ordinary beauty.
  3. I believe that in this photograph value matters a lot. In the photo shown above, not much of colour was presented, however the audience can still find out the usual part of it. The reason for that is mainly due to the use of value/ tone, a pepper in real life are mostly red or green, but the photographer only used black and white. The black pepper and the white plate had made a big contrast in colour to emphasize and make the focus onto the pepper. Even though the photo is fully focused, which means that there is no such a place that is blurry, but the first thing that i’ve saw is always the pepper. I believe that is due to the use of value / tone to make the contrast in colour.
  4. The photographer used straight photography, which is one of the technique in abstract. He has also included tone, value, light, shape, texture and focus.
  5. I really like this style because it has fully fit my vision “the beauty of the ordinary”. This is because my initial idea for the vision was to let the audience pay more attention onto the small and usual thing beside them instead of fancy things. This photograph has truly expressed my feeling by using its own way (as shown in question3) to let the audience focus on the pepper first.
  6. I will adapt this style to my own photography by using similar technique but different subject. For instance, i can choose to take pictures of an apple and use the same value and texture as the picture shown above. This artist has strongly inspired and influenced me by mainly his quote and his photograph. The quote “The camera sees more than the eye, so why not make use of it?” made me realize that one of the biggest use of photography is to let my audience see whats beyond thir eyes. It has also inspired me to take more photos of subjects that are usually not being realized.

photo safari

Which ”element(s)” is/are best represented in each picture?

  1.  This photo used line, tone and texture to represent the first photo in the sheet. This photo used vertical line to separate the green and white colour, which further fortified the use of tone. Without any transition, the colour just goes straight from green to white, which created a strong contrast in the colour. The use of texture is simple in the photo, if you look closely to the green part, you can clearly observe that there are some little dots, which is the same texture as a wall.
  2. This picture used line, shape and tone to represent the second photo in the sheet. This picture used straight lines to create a blue square on the down- right corner of the picture, which’ve got white edge of case covering it. The shape is as i mentioned a square, which is not perfectly taken- its a bit of inclining to the left, this is also one of the reason why it does not fit the original photo well. The tone of the picture is still really simple, its still without any transition colour.
  3. This photo used pattern and texture to represent the third photo in the sheet. This photo used repetition as the blue fur continuously repeating in the surface. This photo have also got a surface area like soft fur that’s like the carpet.
  4. This picture specifically used lines to represent the fourth picture in the sheet. In this photo, the photographer used horizontal lines to separate the different colours.
  5. This photo used lines to represent the fifth photo in the sheet. The vertical lines were lying on a flat surface where there are many different colour dots. Which further indicates that instead of lines, the photo also shows the use of pattern and texture.
  6. This picture specifically used shape to represent the sixth photo in the sheet. The square fit perfectly with the original photo, however the outside has got different colour.
  7. This photo used repetition, line and shape to represent the seventh photo in the sheet. The use of vertical line symmetrically cut the dots in to same shape-a square made up of dots, which further led to the use of repetition, both the lines and the squares are repeating.
  8. This picture used repetition and shape to represent the eighth picture in the sheet. The shape circle is kept on repeating.
  9. This photo used lines, repetition and texture to represent the ninth photo in the sheet. Both the vertical lines and the horizontal lines cut the original square into identical pieces with further led to the use of repetition. The texture is shown in reflection of light, by observing that you can clearly see that the wall is being polished.
  10. This picture used line to represent the tenth picture in the sheet, the oblique line separated the two shape, however this is not very identical to the sheet since it has got two oblique lines.
  11. This photo used line, texture and tone to represent the eleventh photo in the sheet. The gap between two lines are gradually getting smaller, which indicates that as the line continue, they eventually are going to intersect. The texture is also shown by the reflection of the light, which is polished surface. The tone is made up of different colours of dot, which combined together to make a various of colour.
  12. This picture used pattern and texture to represent the twelfth picture in the sheet. The pattern is sort of like repetition but in an unusual way. All the leafs looks like each other but they are not following the repetition pattern. The texture is really similar to the one on the sheet since it’ve all got identical lines.

Try to capture photographs that look like the drawings.

Compare your images with the drawings. Which ones worked and why?

I believe that number 4, 7 and 8 worked pretty well, this is because number 4 has got the exact same type of lines and the different colour shown. Number 7 has got all the square separated by the same thickness of line. Number 8 has got identical holes and shape.

Which ones didn’t work so well, and why?

I believe that number 2 and 10 didnt work well, this is because for number 2, the square was originally on the top, however it is currently on the bottom. Number 10 was meant to have 2 oblique line to show the shape, but there is only one significant line on the current one.

upload a link to your blog (you may want to create a pdf and upload that to your blog – up to you how you present this)


« Older posts

© 2024 Candy

Theme by Anders NorenUp ↑

Skip to toolbar