1. Your Padlet of inspirational ideas, including:
- Images & examples that show your chosen user (fashion style, interests, etc.)

Design Problem: Design effective glasses that suit my targeted audiences: Readers and writers (simply people who read and write a lot; students, possibly)
My glasses will be…
- Fashionable and visually appealing
- Comfortable (light in weight)
- Storable
- Unique (Color, lens shape, etc)
I decided to make glasses for readers and writers because I, myself faced multiple challenges while reading and writing. Whenever I needed to quickly write some notes down, I always forgot to bring pencils; I had to go get them from my bag or my room. It was simply inconvenient. Therefore, I want to design beneficial glasses that have places to store small objects like pencils and erasers. This way, it would be much easier and convenient.
The Padlet below also shows my connection with my users and the development of my ideas. I first gathered characteristics of authors: reading, writing, dressed fashionably, comfortable, and creative. I also noticed they have to carry many stuffs like pencils, notebooks, and erasers because they go through endless writing and revising processes at any time. I thought this would be inconvenient since they might have to carry pencils anywhere they go and might forget. Therefore, I made a connection and thought it would make their lives much more convenient if they have places to put small items in their everyday items: glasses. Therefore, my glasses are going to be storable.
- Examples of glasses (Padlet)
Researching on Padlet really helped me organize ideas about my user and glasses. I first gathered lots of random examples of glasses that seemed interesting and unique. After deciding on the user, I narrowed the research range and searched for specific styles of glasses.
2. Examples of brainstorming:
- Mindmap

- Ideas matrix
 3. Lots of rough sketches of your early ideas:
- Everything you have sketched so far!


I drew many sketches of glasses that would fit my user. Some of them are very random; however, I thought it would be a good practice to draw them. After doing many sketches and research, I have decided to make storable glasses for authors (my user). My glasses will have small places to keep small objects like pencils or erasers.
4. Developmental drawings of more detailed concepts:
- Orthogonal & isometric (3D graphics)


These are the actual measurements of my glasses.
- Vector shapes for laser cutting
Affinity Designer Practice

- Laser Cutting Shapes Drawn in Affinity Design

I have narrowed the glasses’ designs to 5 different shapes: square, heart, round, star, and round star. I drew these 5 shapes because I wanted to see if having “fashionable” shapes like heart and star distract people. I also made the shapes (lens) a little bigger than the usual size because I prefer glasses with big lenses.
- Printed-out Cardboard Prototypes


I was actually very pleased with my printed cardboard prototype. It was not too fashionable and not too boring.
5. Visible evidence of feedback and decision-making:
- How did you collect feedback from peers and “user”?
I asked my friends for critical feedback about my design, specifically, if the designs made sense and were actually helpful for “the users.”
- What was your response to the feedback you received?
My friends told me the designs made sense; however, I received some feedback regarding the lens’ shape. Specifically, the unusefulness of fancy shapes since the sharp or round edges may interrupt the users from concentrating/writing. Therefore, I went back to the mindmap and looked through all my notes to see if the unique lens shape was needed. Eventually, I decided to get rid of the heart-shaped-lens and use a square-shaped lens.
6. Create:
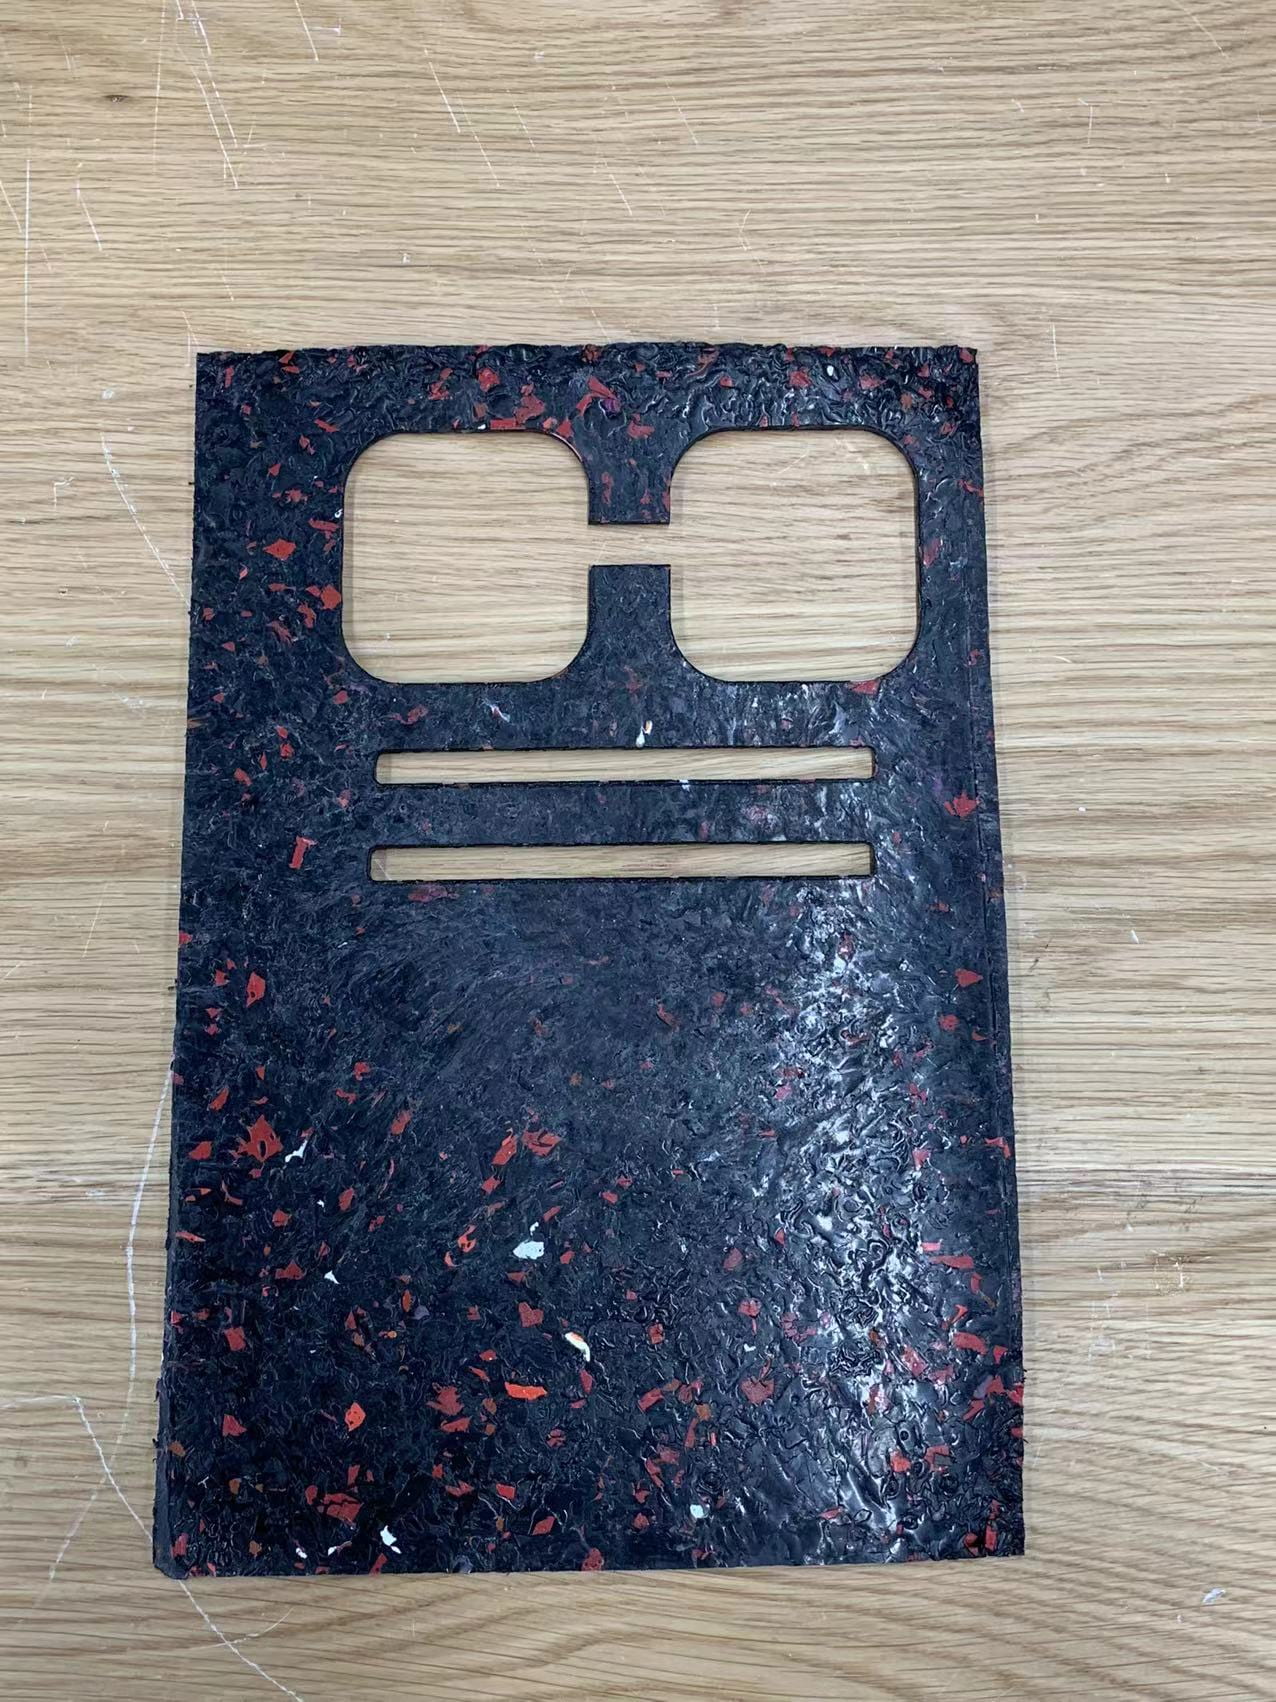
I decided to re-use some plastics at school to make my final glasses since it is eco-friendly, and I have always wanted to try out these plastic materials. I wanted my glasses to have black as the base color and some bits of pink. So I went to the plastic-collection area (behind the MS/HS cafeteria) and collected lots of black and pink plastics numbers 2 and 5. It had to be plastics numbers 2 or 5s since they were the only ones that did not emit any toxic gasses during the melting process. One issue I faced during this process was collecting enough plastics because plastics at the plastic-collection area were not enough. I initially thought there would be lots of plastic wastes, but It was actually quite hard to find numbers 2 and 5. Most plastics at home and around the school were all number 1s. Therefore, to resolve this issue, I asked my friends to hand me some plastics that they are not using. After collecting enough of them, I re-washed the plastics with soap and dried them completely for 2 days.

After 2 days, I shredded them and melted them into a plastic sheet. During this process, I actually faced another problem: the pink plastics and black plastics could not be mixed together. The pink was actually a number 2, and black plastics were number 5. If we melt them together, it will emit huge amounts of toxic gas. Therefore, instead of using pink plastics, I decided to use some red. Red also turned out pretty well because it gave a natural and unique blend with the black.

I cut the plastics into the shape I had designed previously. Then, I glued the bridge and the glass part together. This process was a bit challenging for me because the plastics did not stick well, even when I tried gluing with a hot glue gun. Therefore, I had to glue multiple times to make layers of glue.


I am overall very proud and satisfied with my final work. I liked the unique color that had small bits of red and orange. However, I personally feel I could have made the plastic sheet a little thicker because my sheet was too fragile. The bridge kept broke, so I had to glue the glasses together. I also could not make the glasses “storable” because the plastics were too thin; they did not stay still. Therefore, next time, I would like to try making the acrylic glasses keep them stable. The last thing I can improve is making the edge of the bridge more round so it feels more comfortable when you wear it; mine was too “edgy,” so it was kind of itchy.

I made a poster of my final glasses. Even though my actual glasses were not storable, I tried to show my original idea to the poster.
November 25, 2021 at 2:45 pm
Hi Kelly, well done for an excellent project. Your blog reflection is really detailed and enjoyable. Your finished glasses look great! It would be good to see a little more development of the storage function because you might be able to make a model to show it in a simple way. Overall, great work!